Reusable Attribute Transforms
When incoming data needs to be transformed via a function not covered in Nexla's pre-built transform functions, users can create a custom reusable attribute transform function using Python, JavaScript, or JSON. Reusable attribute transforms are added to the list of transform functions used to create Nexset Rules in the Nexset Designer.
1. What are Reusable Attribute Transforms?
Reusable attribute transforms consist of custom transform code that provide reusable transform functions for individual attributes in a Nexset.
Reusable attribute transforms are applied to individual Nexset attributes.
To learn how to create custom reusable transforms that define the entire output Nexset, see Reusable Record Transforms.
Once created, reusable attribute transforms can be accessed within the pulldown Function menu in Transform Builder mode in the Nexset Designer and can be used in any data flow, avoiding the need to recreate custom attribute transforms each time they are applied.
Reusable attribute transforms can also be shared with others in a user's organization.
2. Create a Reusable Attribute Transform
This section provides instructions for creating a new reusable attribute transform in Nexla.
2.1 Create a New Reusable Attribute Transform
Navigate to the
 screen in the
  section.
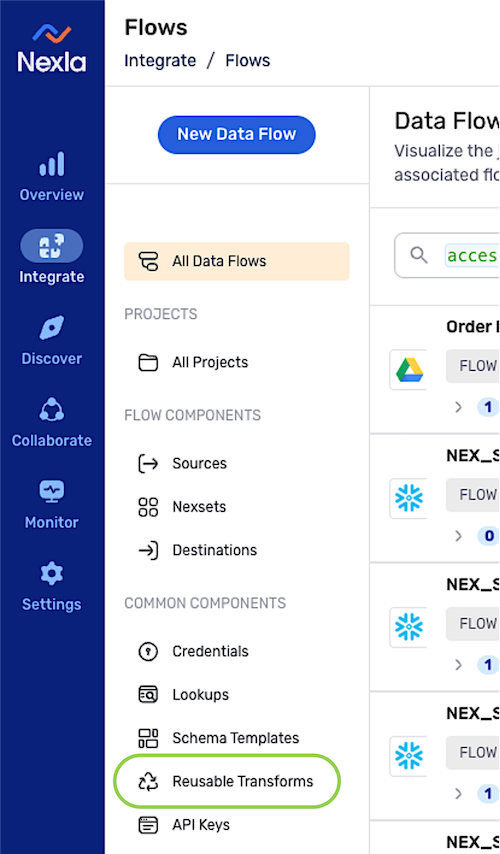
Ensure that the
 tab is selected.
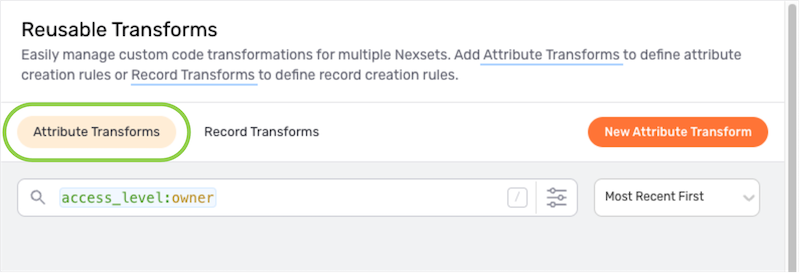
Click
 to open the Create Attribute Transform screen.
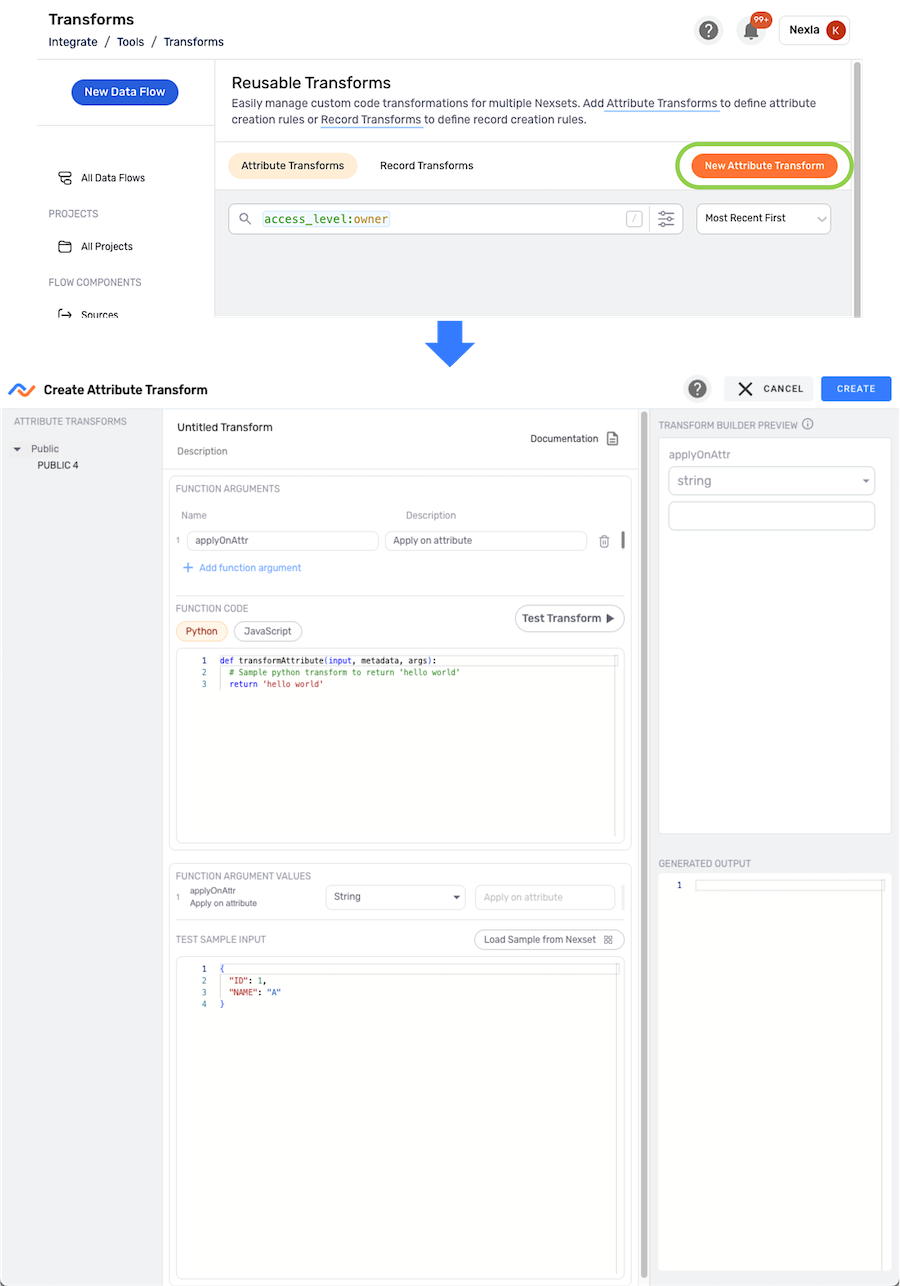
2.2 Attribute Transform Name & Documentation
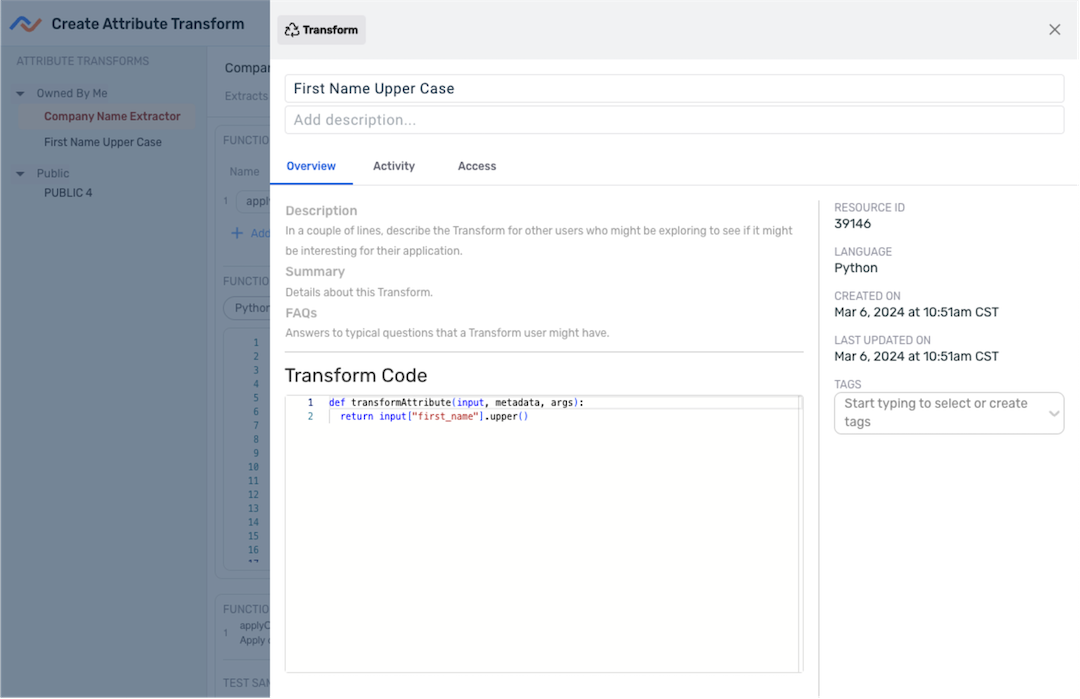
In the Create Attribute Transform screen, enter a name for the custom attribute transform in the text field at the top of the center panel.
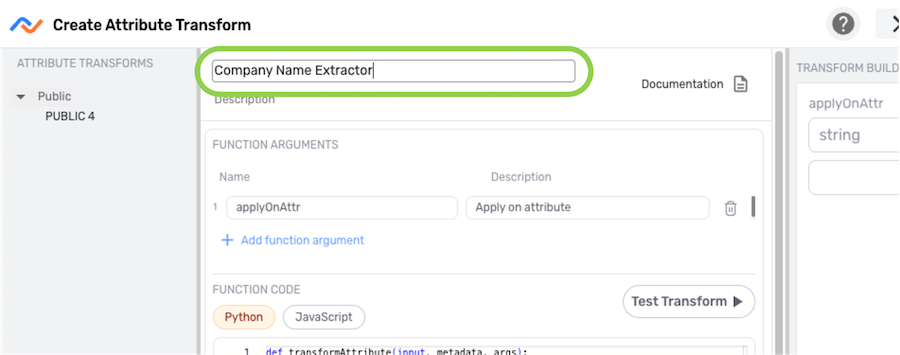
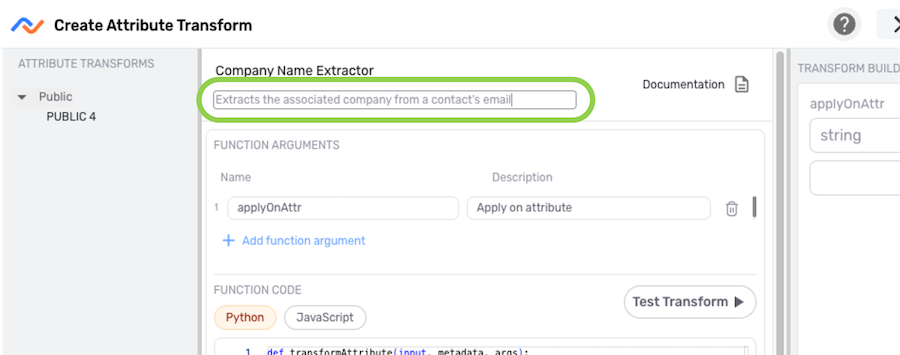
Enter a brief description of the custom attribute transform in the Description text field below the transform name.
Text entered in this field will appear as the transform function summary in the Function pulldown menu in the Nexset Designer.
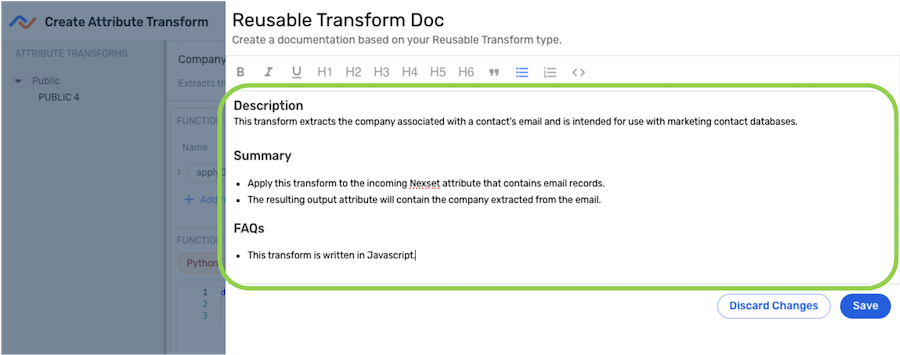
Optional: Click
 in the top right corner of the center panel to open the Documentation drawer, and enter an expanded description and/or additional information about the transform in the text field.
 Documentation helps users understand what a custom attribute transform does, its intented purpose, etc. This is particularly useful when an organization includes many resources and many users, as well as when triaging data flows.
- Click
 to save the entered information and close the Documentation drawer.
- Click
2.3 Define the Transform Function
Select the language that will be used for the attribute transform by clicking the Python or JavaScript button at the top of the Function Code box.
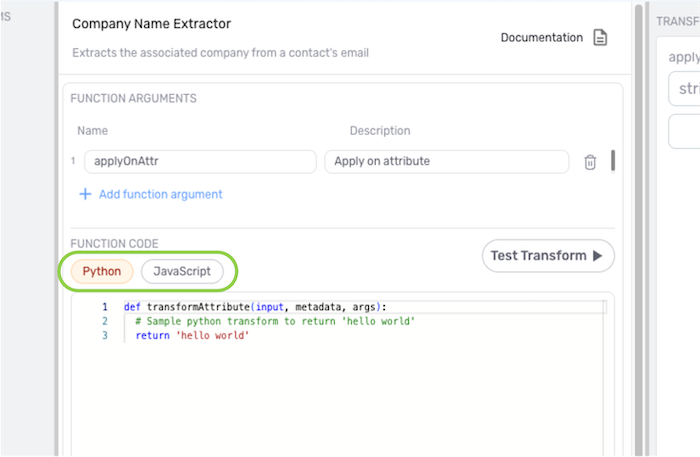
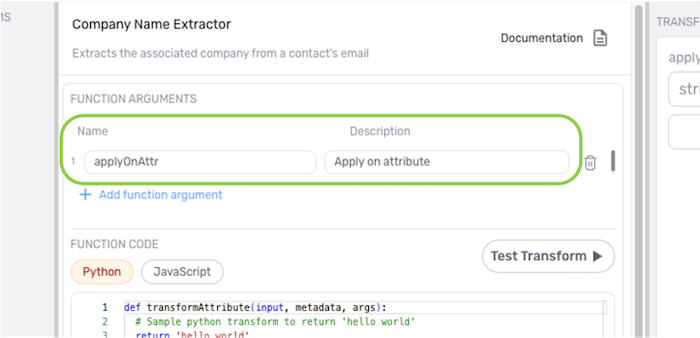
In the Function Arguments box, enter a name and description for the function argument(s).
infoFunction arguments are selectable variables that will be surfaced to users of the transform.
To include additional arguments, click
 at the bottom of the arguments list.
 To Delete an argument from the Function Arguments list, click the
 icon to the right of the argument.
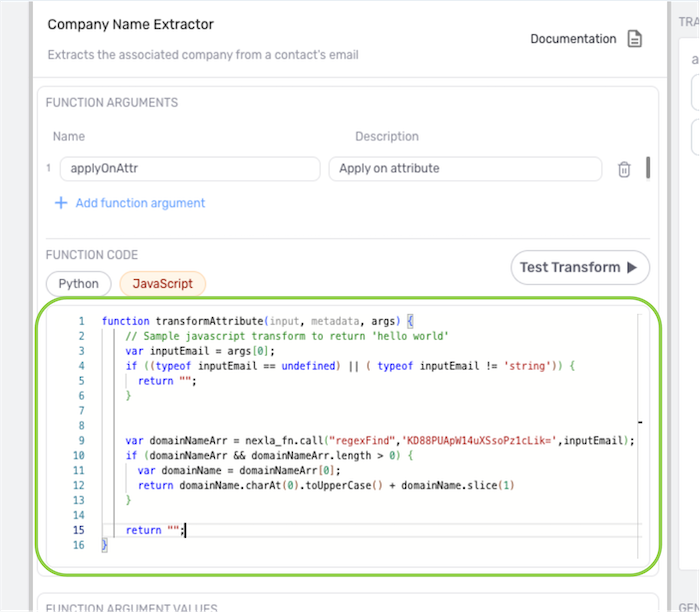
Enter the attribute transform code in the Function Code text box using the language format selected in Step 1.
 Attribute Transform Formatting & Preview
Transform Code Format:
The attribute transform function signature follows the format oftransformAttribute (input, metadata, args). Attribute transform functions receive an entire record as input.Typically, at least one argument that contains the name of the input attribute value to be transformed should be defined.
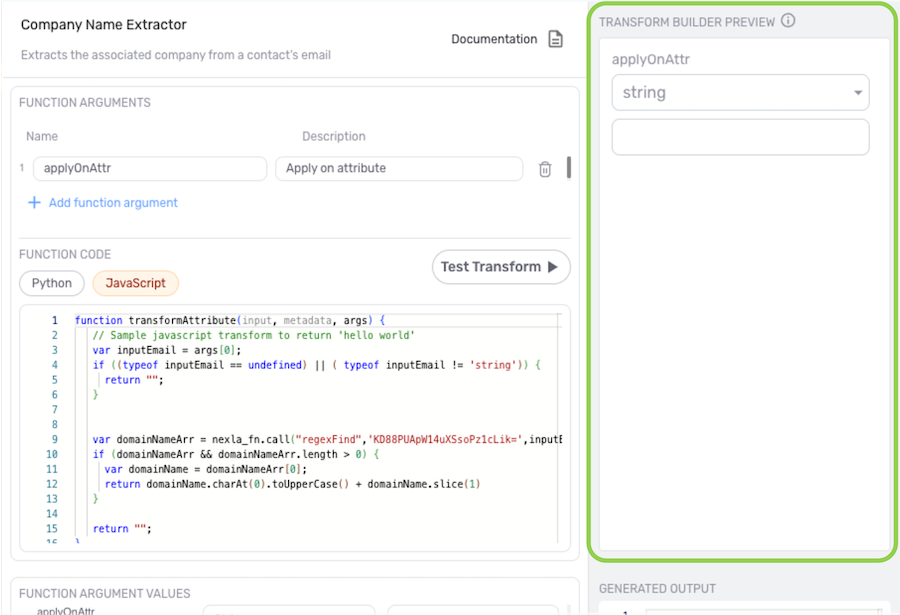
Transform Builder Preview:The Transform Builder Preview box at the top of the right-side panel shows a preview of the pulldown menus and/or text fields that will be shown to users who apply this transform using Transform Builder mode in the Nexset Designer.
The associated pulldown menus and/or text fields that will be shown to users of the transform are listed under each function argument.
 Reference Existing Transforms
When creating a custom attribute transform, any existing custom attribute transform accessible to the account can be referenced using the Attribute Transforms panel on the left side of the screen.
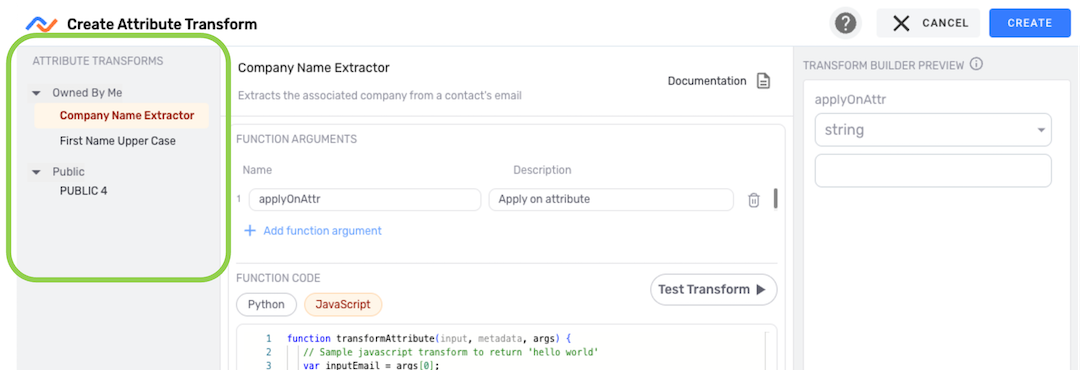
Click on a transform listed in this panel to open the transform information drawer. This drawer displays information about the transform in addition to the transform code. Any portion of the code can be copied for use in the new attribute transform.
2.4 Test the Attribute Transform Function
Once the custom attribute transform code has been entered, the function can be tested using sample data. This sample data can be entered manually or pulled from an existing Nexset.
Enter or select sample data with which the custom attribute transform will be tested. The steps below provide instructions for loading sample data from an existing Nexset or entering the sample data manually.
- Load Sample Data from a Nexset:
In the Test Sample Input box at the bottom of the center panel, click the
 button.
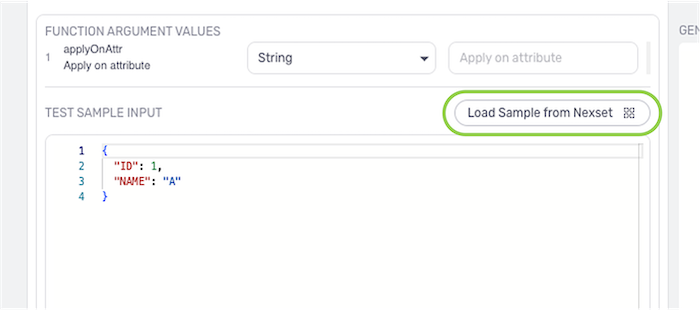
Use the Load Sample Data from a Nexset window to select a Nexset from the list. A sample record will be loaded from the selected Nexset to test the custom transform function.
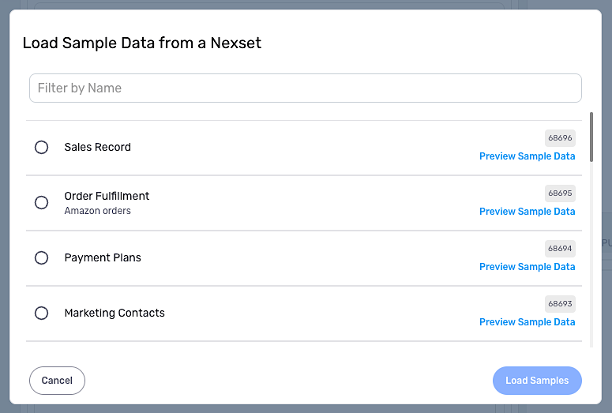
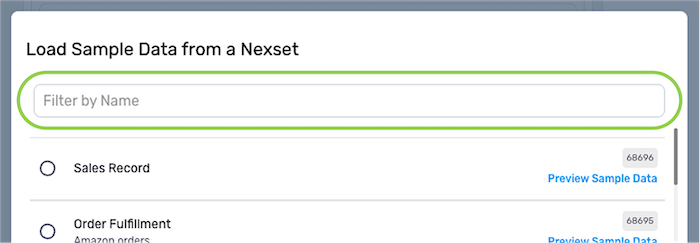
To filter listed Nexsets by name, enter the full or partial Nexset name in the text field at the top of the window.
Select a Nexset by clicking the option button to the left of it.
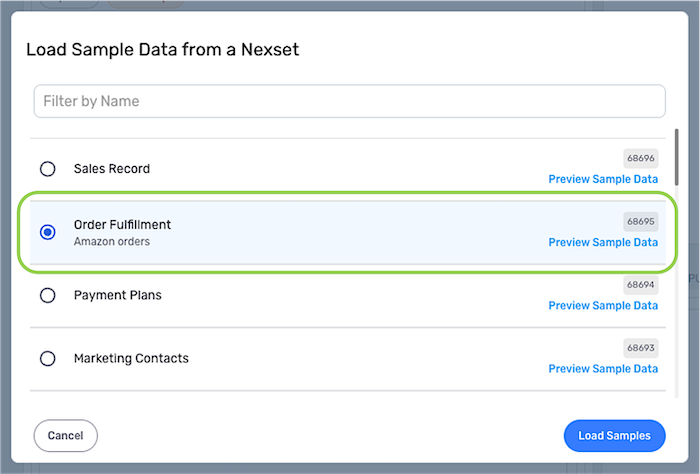
Click the
 button in the bottom right corner of the window to load a sample record from the selected Nexset into the Test Sample Input box.
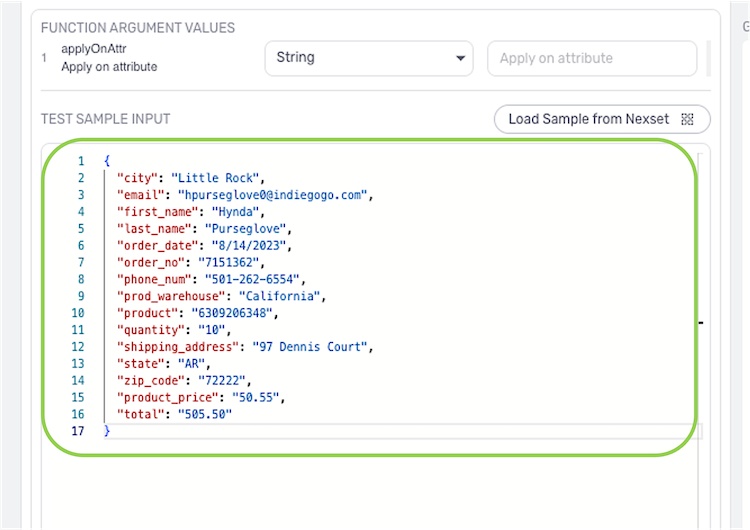
- Enter Sample Data Manually:
To enter sample data manually, type the sample data into the Test Sample Input text field at the bottom of the center panel.
Sample data must be entered in JSON format.
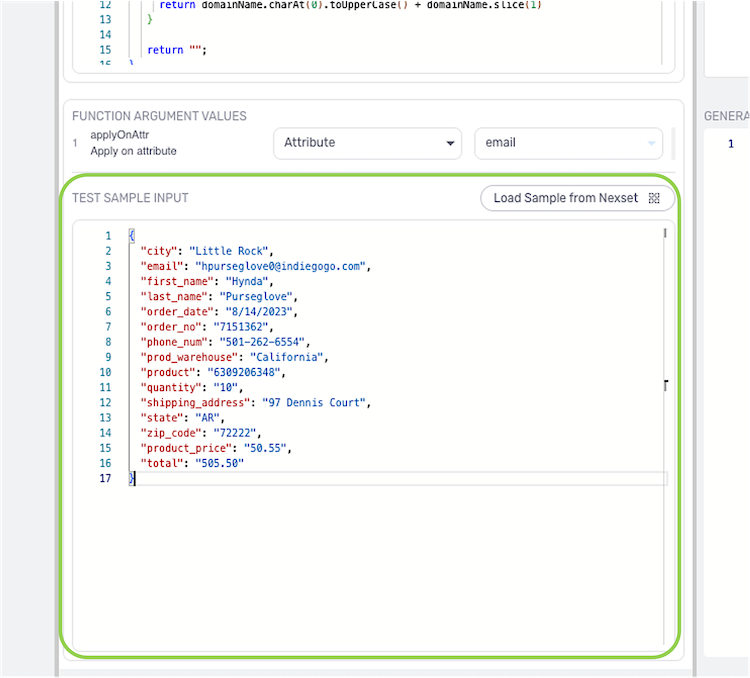
In the Function Argument Values box, select the input type to which each argument should be applied, and enter or select the corresponding value(s).
Select Argument Value Type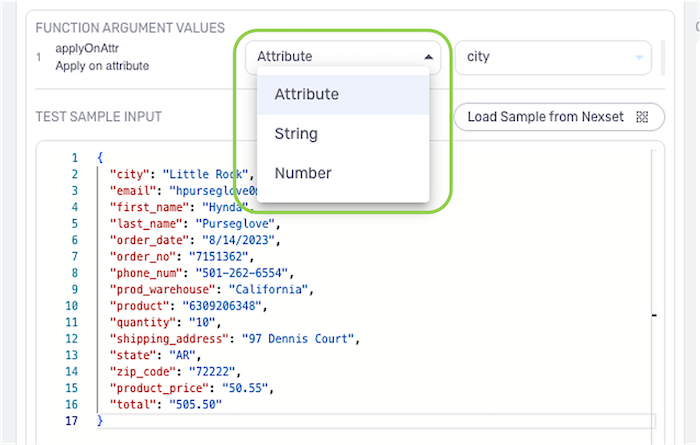
Select Argument Value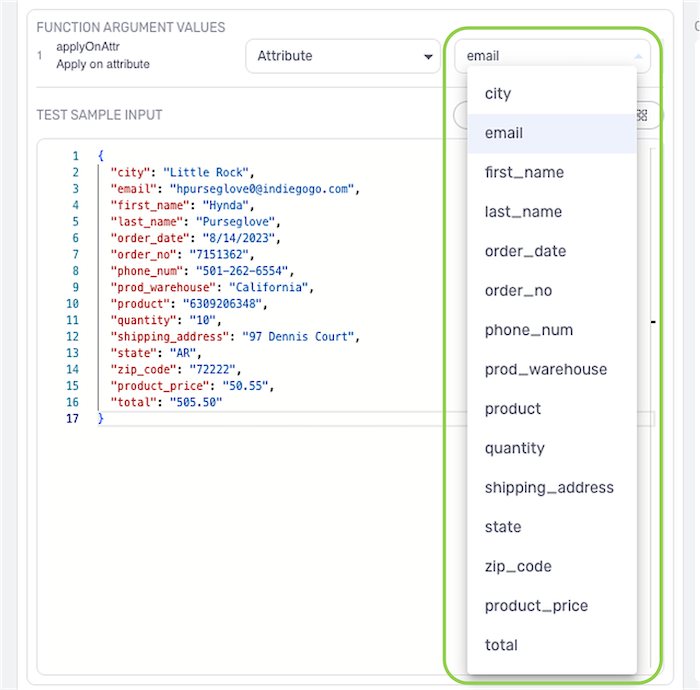
Click the
 button at the top of the Function Code box—where the custom transform code was entered in Section 2.3— to apply the transform to the sample data.
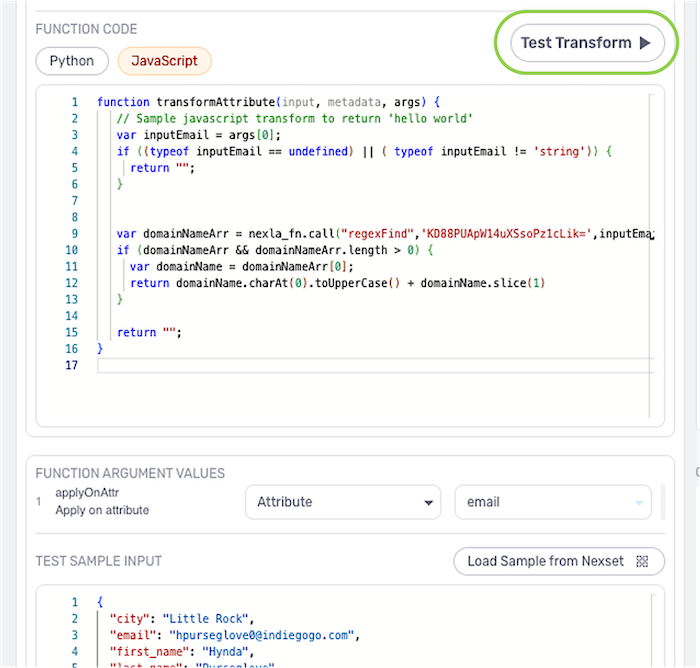
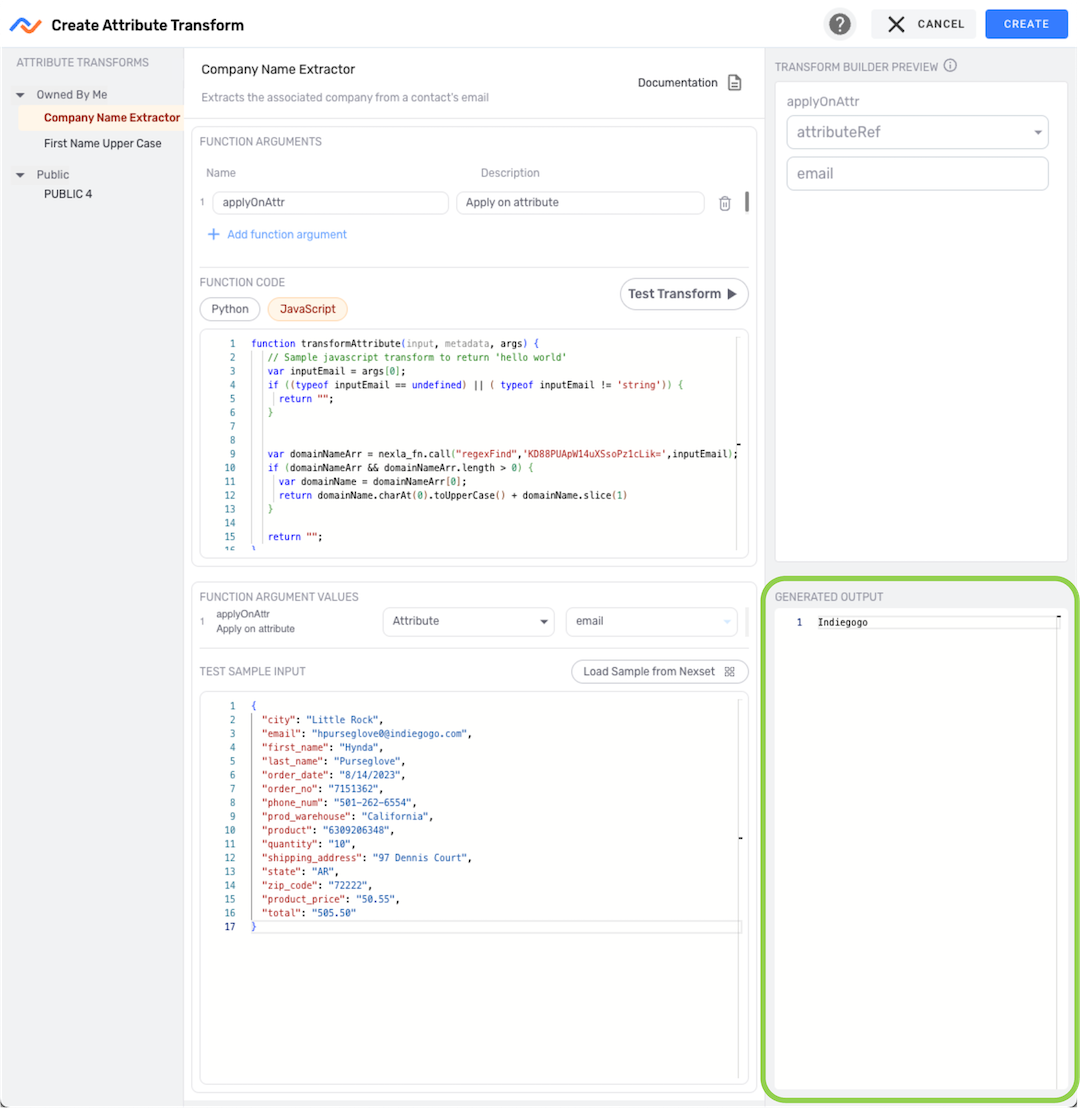
The output data resulting from applying the custom transform to the sample data will be shown in the Generated Output box on the bottom-right of the screen.
2.5 Save the Reusable Attribute Transform
Once the custom attribute transform has been entered and tested to confirm that it produces the expected output, click
 in the top right corner of the screen to save and create the transform. info
The reusable attribute transform will now be accessible to the owner from the Function menu in the Nexset Designer. To learn how to share reusable attribute transforms with other users, see Section 4.
3. Use a Reusable Attribute Transform
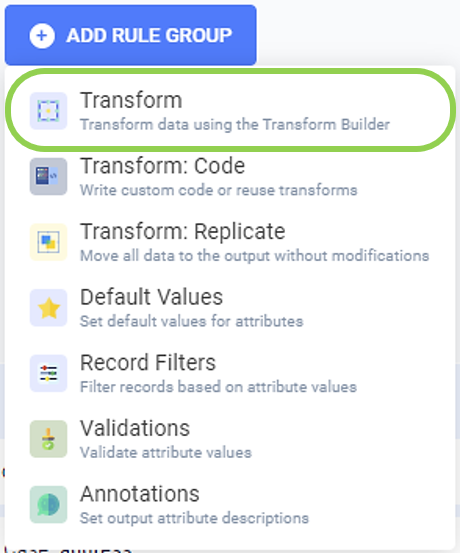
- To apply a reusable attribute transform in a new rule group:
In the Nexset Designer, click in the Nexset Rules panel, and select
  from the dropdown menu.
- To add a reusable transform to an existing Transform rule group:
Click at the bottom of the rule group.
- To apply a reusable attribute transform in a new rule group:
Enter a name for the output attribute in the Output Attribute field.
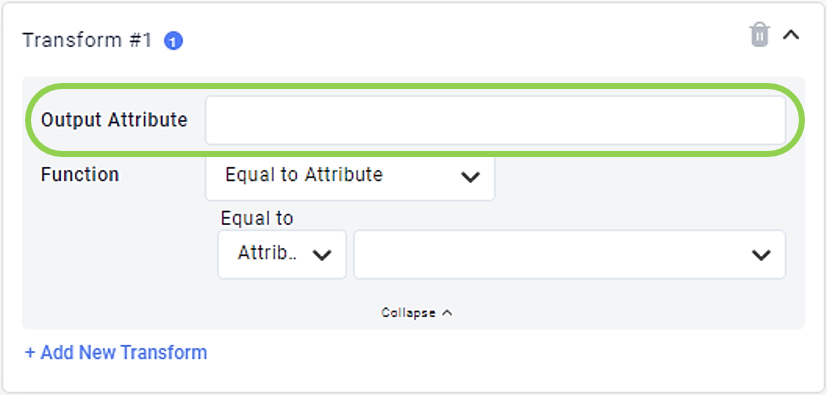
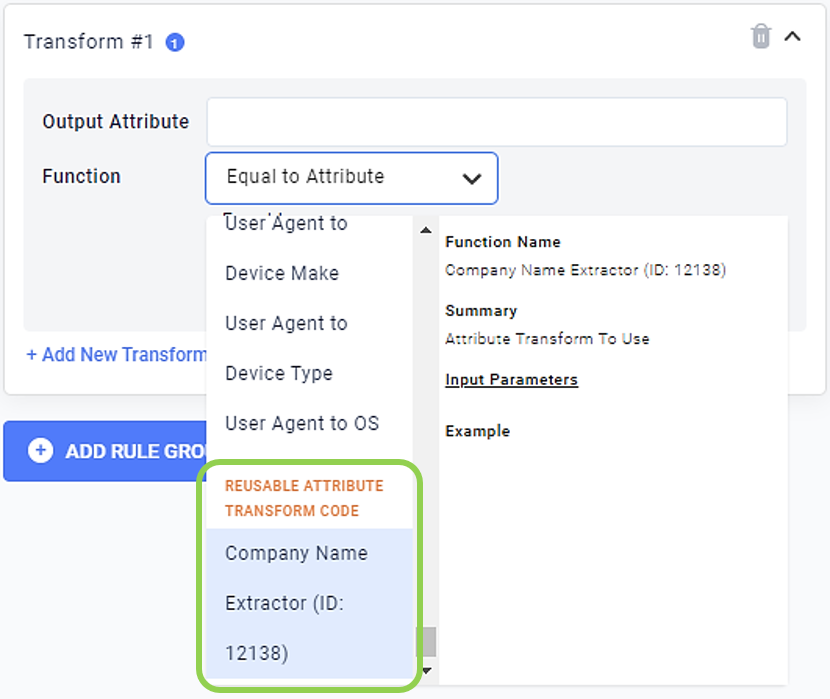
Use the Function pulldown menu to select the desired reusable transform.
infoAvailable reusable transforms are listed under the "Reusable Attribute Transform Code" category located at the bottom of the Function list.
Populate the required fields, and click
 to generate output samples in the Nexset Output panel.
Click
 in the top right corner of the screen at any point to save the current transform progress. Once the transform is complete, click
  to save the transform and close the Nexset Designer.
4. Share a Reusable Attribute Transform
To share a reusable attribute transform, navigate to the
screen in the section, and select the tab. 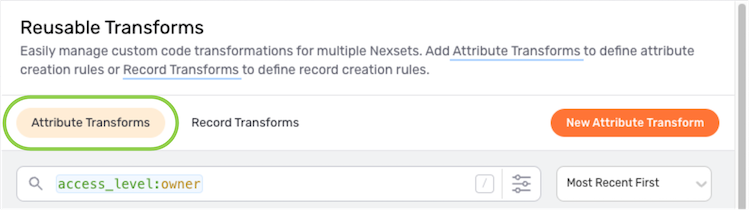 Attribute Transforms Tab
In the Attribute Transforms tab, all reusable attribute transforms accessible to the user can be viewed.
By default, custom attribute transforms owned by the user are shown. To view shared transforms, change the value of theaccesskeyword tocollaboratorin the search bar at the top of the screen.

Click on the transform to be shared to open its information drawer, and select the Access tab.
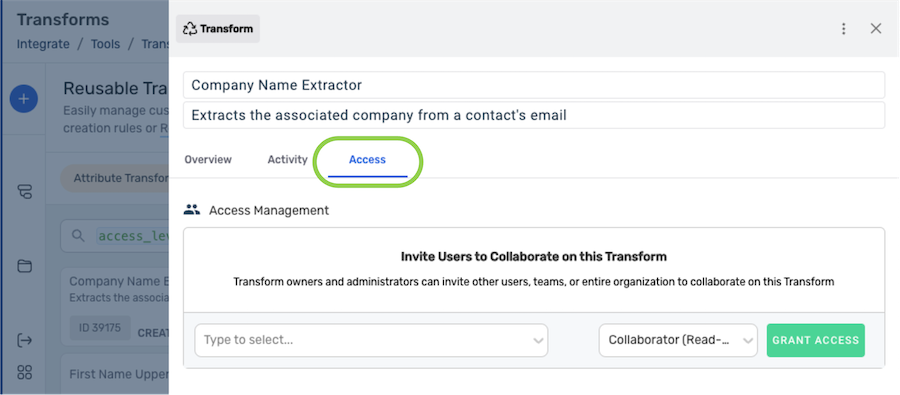
Use the pulldown menu on the left to select the user, group, or email address with whom the transform will be shared.
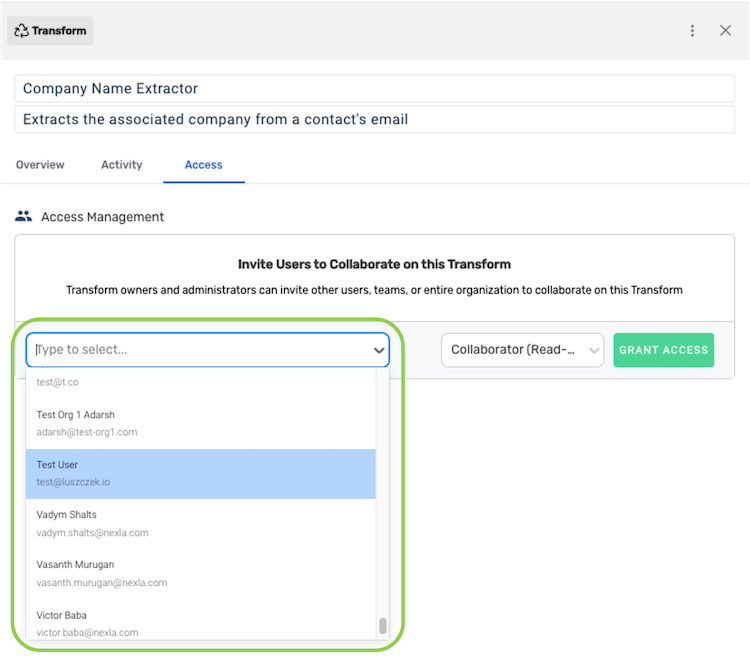
Choose the level of access that will be granted to the selected user(s) from the pulldown menu on the right.
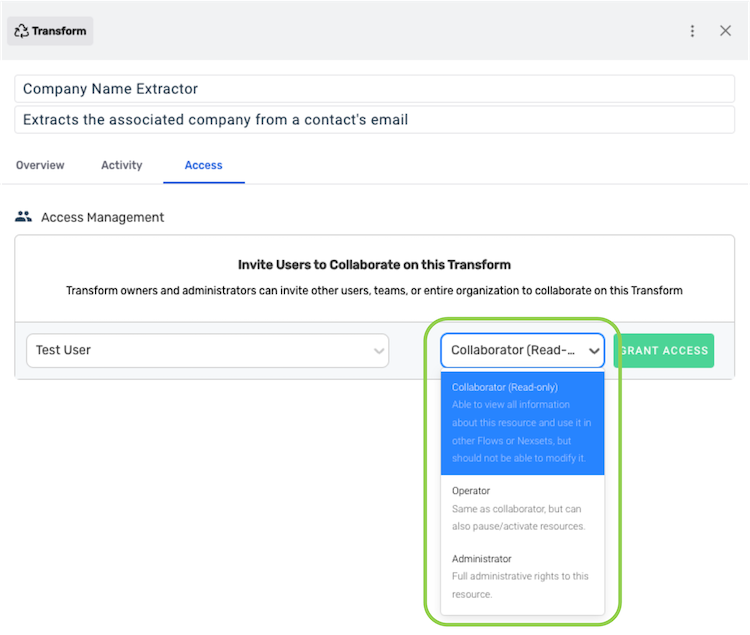
Click the
 button to share the reusable attribute transform with the user(s) at the selected access level.
 - The shared reusable attribute transform will now be accessible to the selected user(s) from the Function menu in the Nexset Designer.
5. Edit a Reusable Attribute Transform
When a reusable attribute transform is applied to a Nexset, that Nexset references the applied transform resource. Because the Nexset references the attribute transform resource, any changes to a reusable attribute transform are automatically applied to any Nexsets currently referring to that transform.
Therefore, use caution when editing a custom reusable attribute transform, as edits will affect existing Nexsets/data flows using the transform.
To edit a reusable attribute transform, navigate to the
screen in the section, and select the tab. Access LevelsUsers can only edit owned reusable attribute transforms and those to which they have been granted Administrator access.
Click
 on the transform to be edited, and select
  from the dropdown menu.
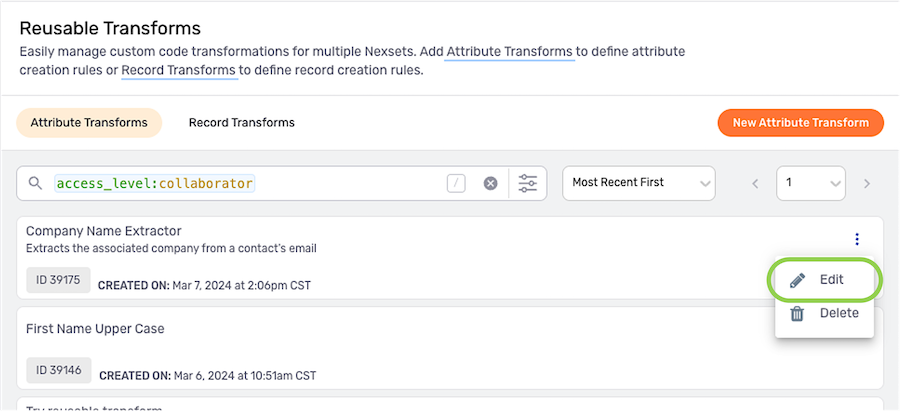
In the Edit Attribute Transform screen, users can make any necessary edits to the transform code, name, and description.
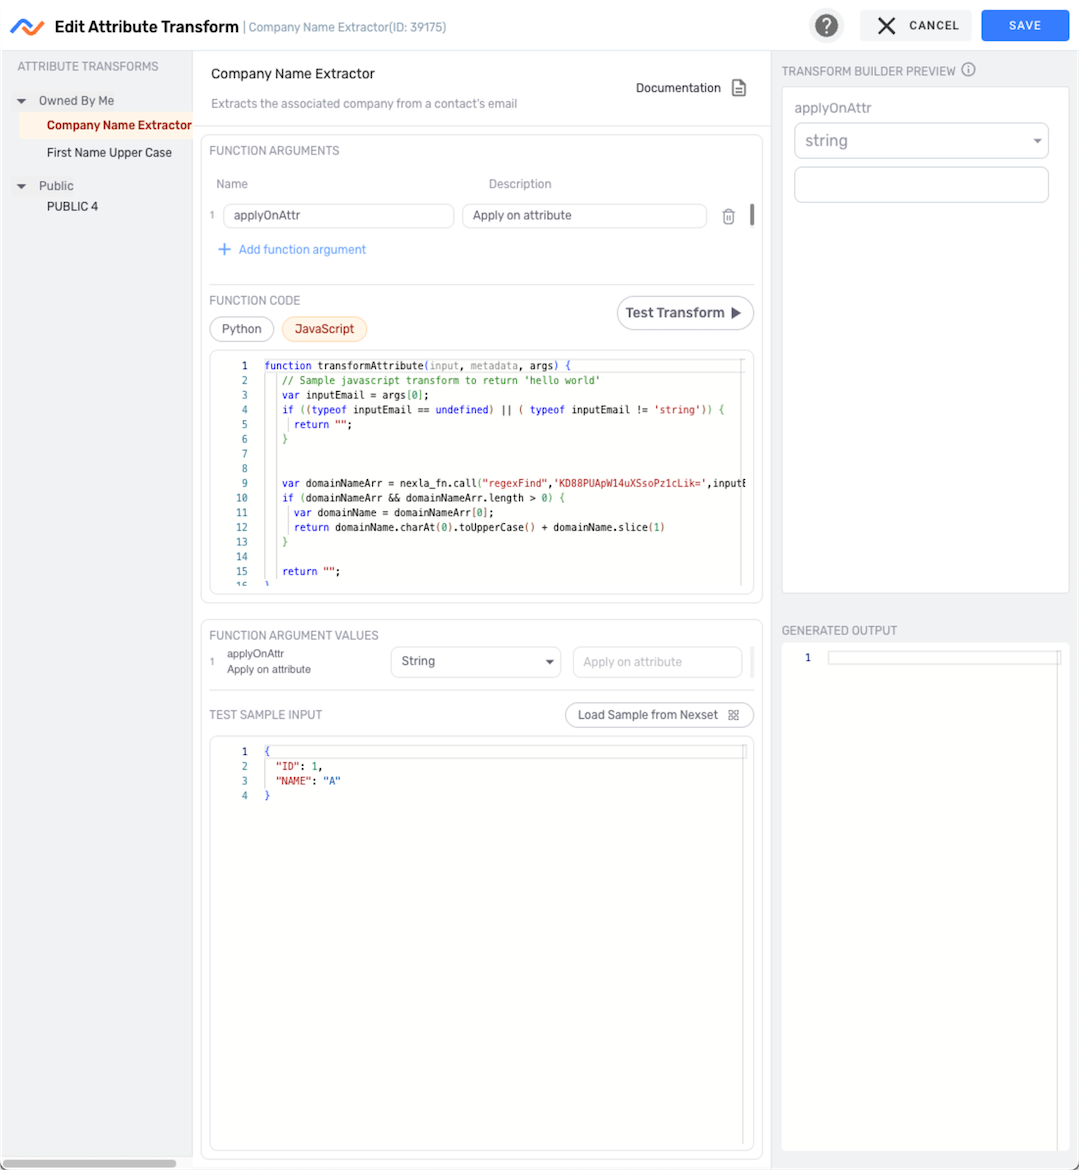 Testing Edited Transforms
When editing the code of a custom reusable attribute transform, before saving the edits, follow the instructions in Section 2.4 to test the edited transform code and ensure that the expected output data is generated.
Once all edits are complete, click
in the top right corner of the screen to save the changes to the reusable attribute transform.