Nexset Designer Overview
This article describes the functions and features of the Nexset Designer. The Nexset Designer is the screen used to design transformations of incoming data to create new Nexsets. It makes performing data transformations and management simple and allows users to easily visualize how their data transformations work.
1. Accessing the Nexset Designer
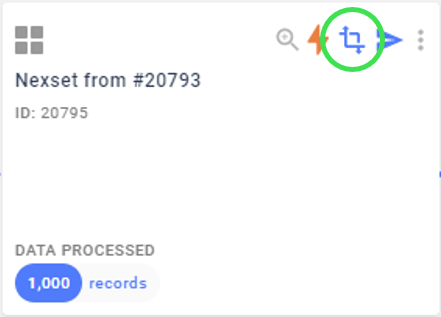
To access the Nexset Designer, click on the Transform icon ![]() on any Nexset to begin setting up a transformation.
on any Nexset to begin setting up a transformation.
2. Nexset Rules Panel
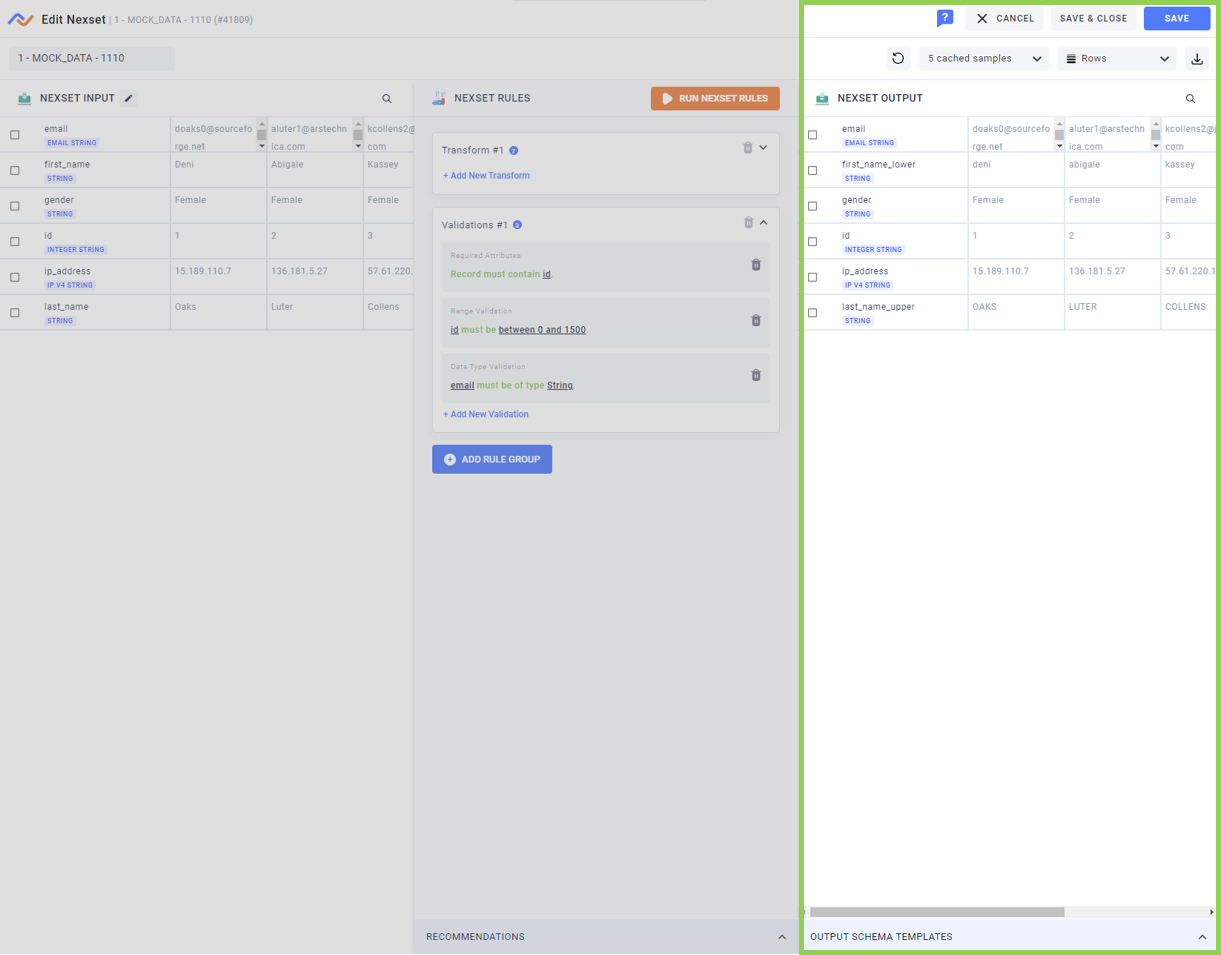
The Nexset Rules panel is where transformation rules, validations, default values, record filters, annotations, and custom transform code can be entered to configure a Nexset transformation. It is located in the middle of the Nexset Designer screen.
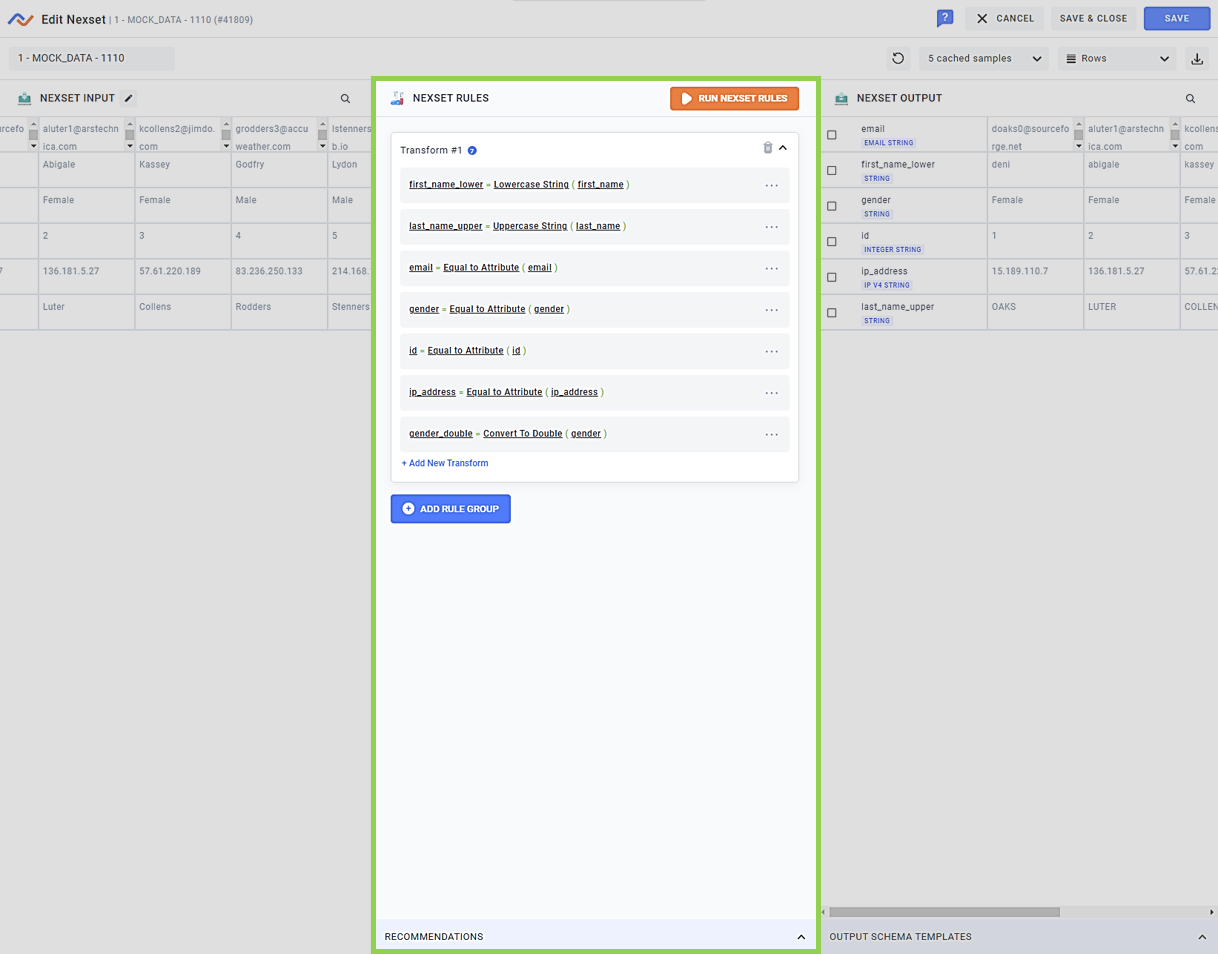
2.1. Creating New Nexset Rules
To create a new Nexset transformation rule, click the ![]() button in the Nexset Rules panel. This will open a menu allowing users to select the type of rule group to add. Select from the options described below to add a new rule group of the corresponding type.
button in the Nexset Rules panel. This will open a menu allowing users to select the type of rule group to add. Select from the options described below to add a new rule group of the corresponding type.
More information about rule groups is provided in Section 2.4.
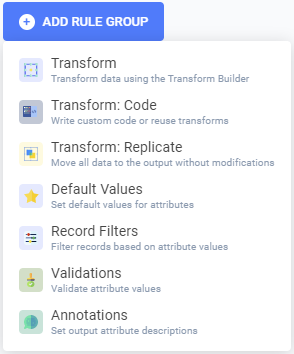

This option creates a new Transform rule using one of the pre-built transforms included in Nexla. Use the Function menu to select the desired transform rule, and enter the required information in the associated pulldown menus and text fields.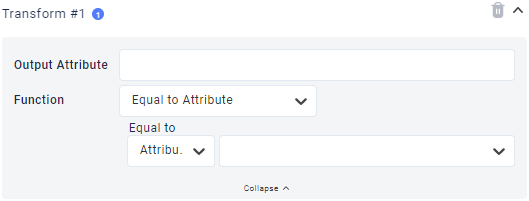

This option allows users to enter custom or reused transformation code. Use the pulldown menu at the top to select from Python, JavaScript, or JSON to enter the desired custom transform code.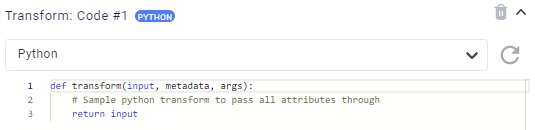

This option is only available if no changes have been made to the input Nexset with other rule types. It creates a Replicate transform rule that passes all data contained in the input Nexset directly to the output Nexset without any transformations.

This option creates a new Default Value rule that allows users to specify default values for input Nexset attributes. Use the pulldown menu on the left to select the attribute for which a default value should be set, and use the second menu to select the type of default value to apply—a null value, string, or number. Then, use the text field that appears to enter the desired default value.

This option creates a new Record Filter rule that allows users to filter Nexset output values based on the values of input Nexset attributes. Use the pulldown menu on the left to select the attribute to which the filter should be applied, and use the menu next to it to select the desired filter type. For some filters, an additional menu and/or text field will appear to specify the associated parameters.

This option creates a new Validation rule group. By default, the type of rule added is a Required Attribute validation. Click on the text field to enter the desired attribute or select it from the menu that appears. To add another type of validation rule, click at the bottom of the rule group, and select the desired validation type from the menu that appears.
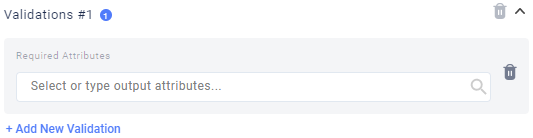

This option allows users to enter descriptive annotations of output Nexset attributes. Use the menu at the top to select the desired output attribute, and enter the annotation in the Description text field.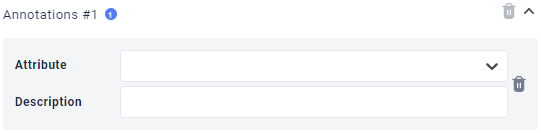
Any rule for which one or more necessary parameters have not been specified is indicated as an "Incomplete transform rule" and will not be applied by Nexla.
2.2. Previewing Rule Outputs
Once a rule has been added to the draft in the Nexset Rules panel, the ![]() button on the top right of the pane will begin to flash and display a text prompt stating "Click here to apply changes".
button on the top right of the pane will begin to flash and display a text prompt stating "Click here to apply changes".

Click
 to apply the current transformation rules to the input Nexset. A preview of the corresponding output to be included in the transformed Nexset will be shown in the Nexset Output pane on the right.
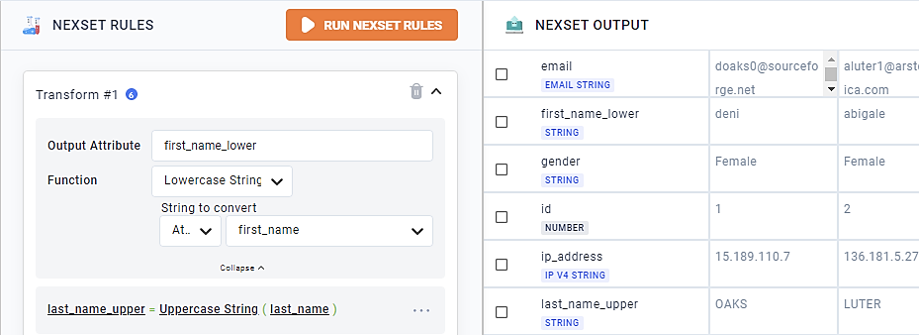
This preview allows users to view how rules will affect data throughout the process of drafting a new transformation, making it easy to create, modify, and troubleshoot transformations.
For more information about the Nexset Output pane and viewing output samples, see Section 5.
2.3. Recommended Rules
Recommended rules are now provided at the bottom of the Nexset Rules panel and can be viewed at any time by expanding the menu from the bottom of the panel. These rule recommendations can be used to quickly get started building a transformation or easily add Nexset rules to your transform.
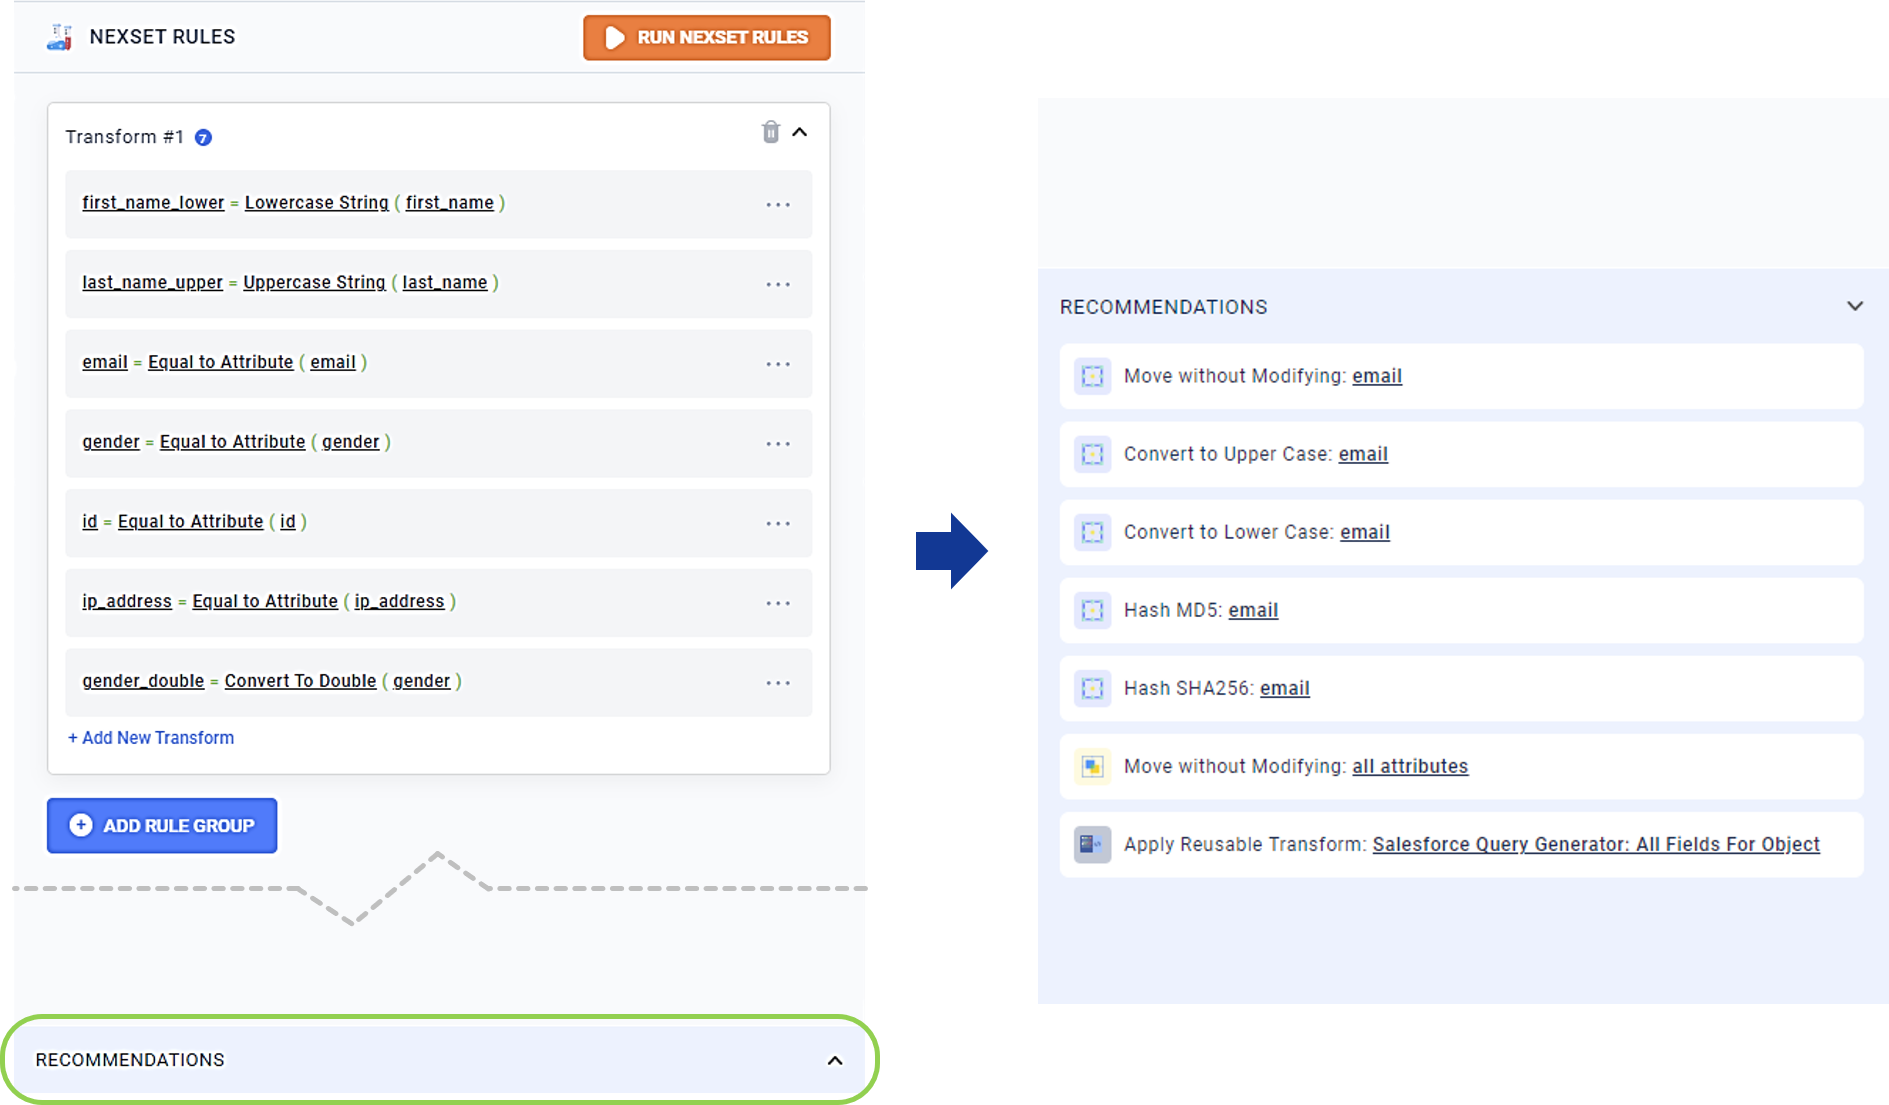
The recommended rules are based on the overall content of the Nexset when no attributes are selected in the Nexset Input panel. When one or more attributes are selected, the recommendations list is updated based on the selected attribute(s).
Click on a recommended rule to apply it. It will then be added to the Nexset Rules pane and prepopulated with the recommended parameters; however, the prepopulated values can be edited. An added rule can be expanded for viewing or editing by clicking on it.
Recommended rules are automatically applied to the input Nexset when added; thus, there is no need to click
to generate updated output sample previews unless changes are made to an added rule. 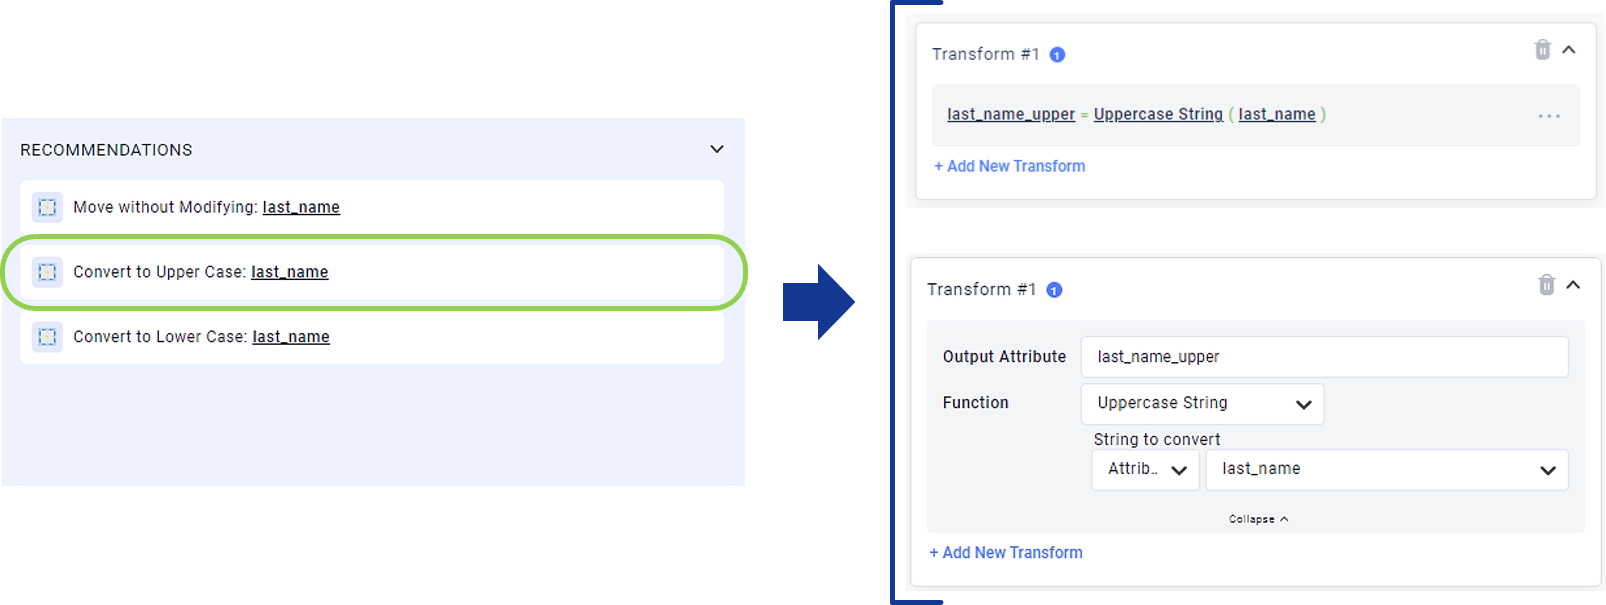
2.4. Rule Groups
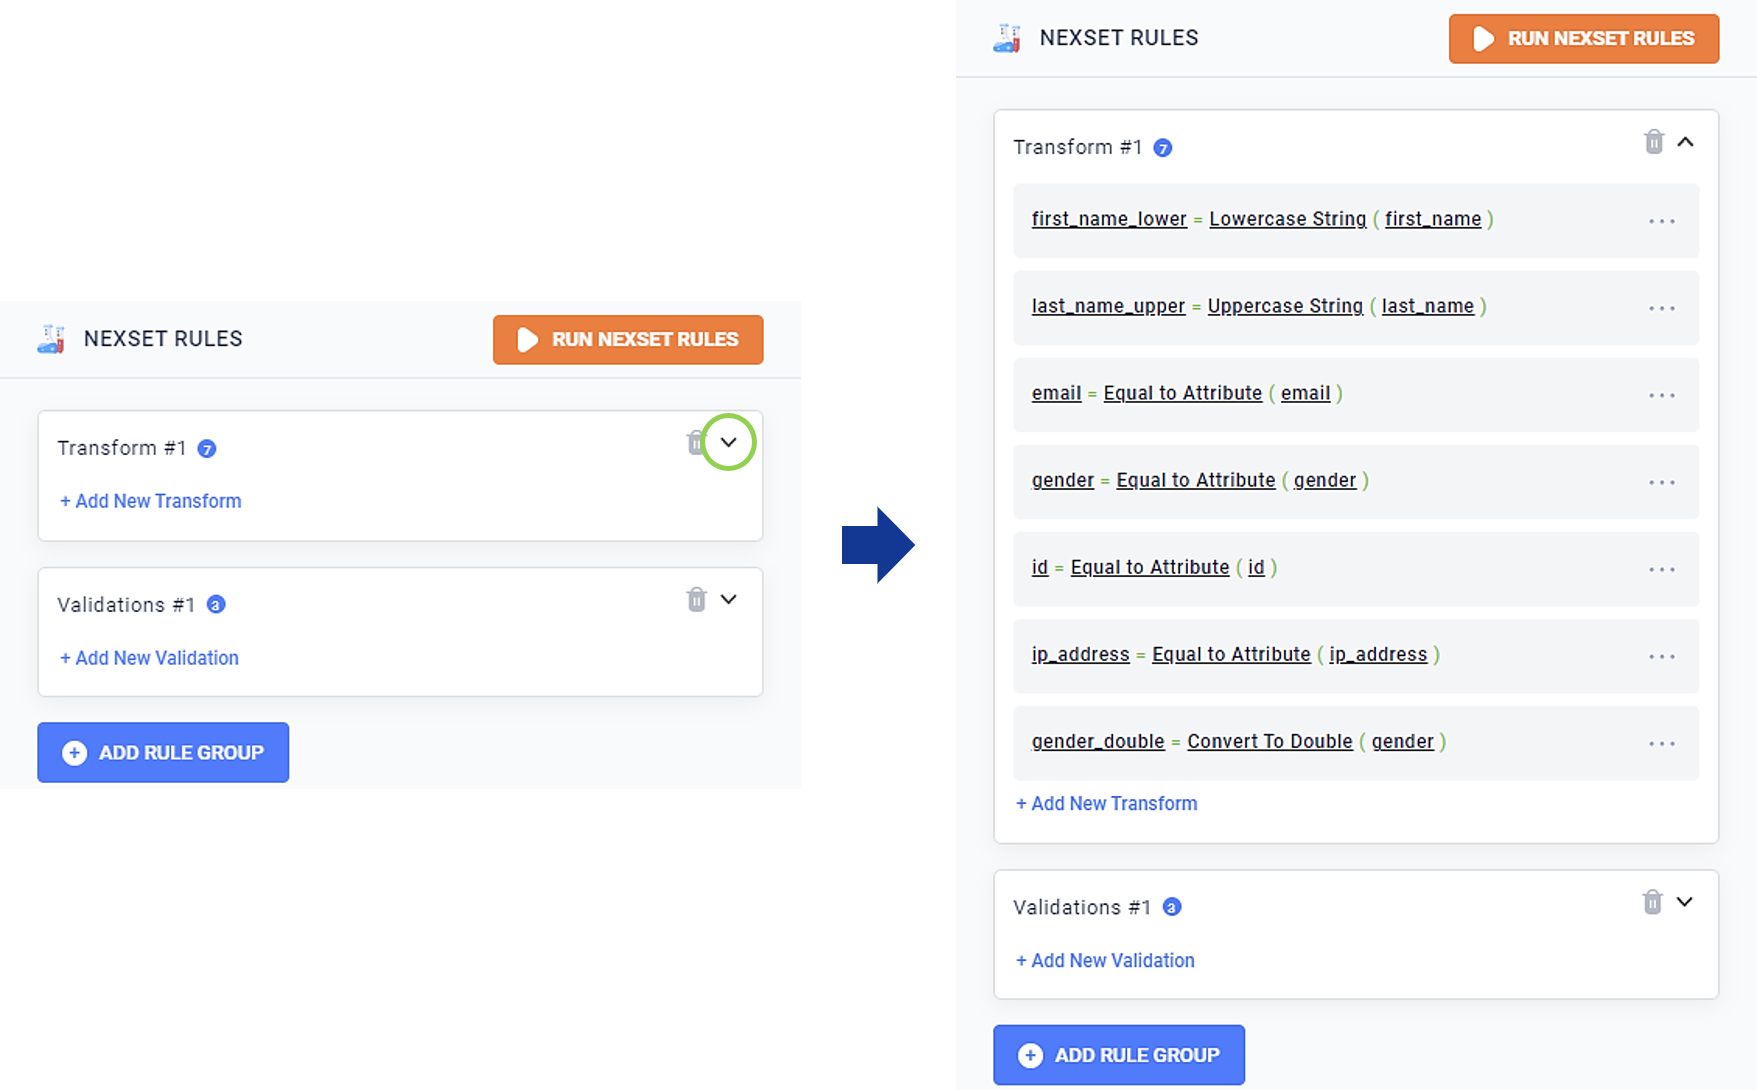
In the Nexset Designer, Nexset rules in a transformation are displayed in rule groups, which allow users to clearly visualize how transform rules are applied to a Nexset. Each rule group is named according to the type of transform rule(s) that it contains.
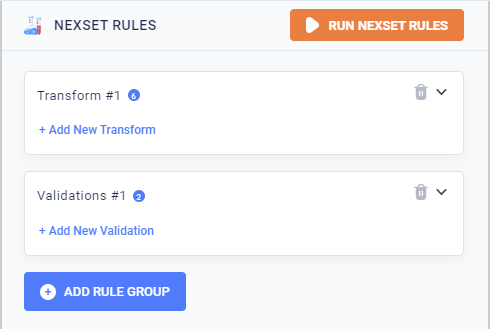
Within each rule group, Nexset rules are displayed in the order in which Nexla applies them to the input Nexset, allowing users to easily understand how each transformation works. Additionally, viewing Nexset rules in their applied order can simplify troubleshooting processes, particularly for larger and/or more complex transformations.
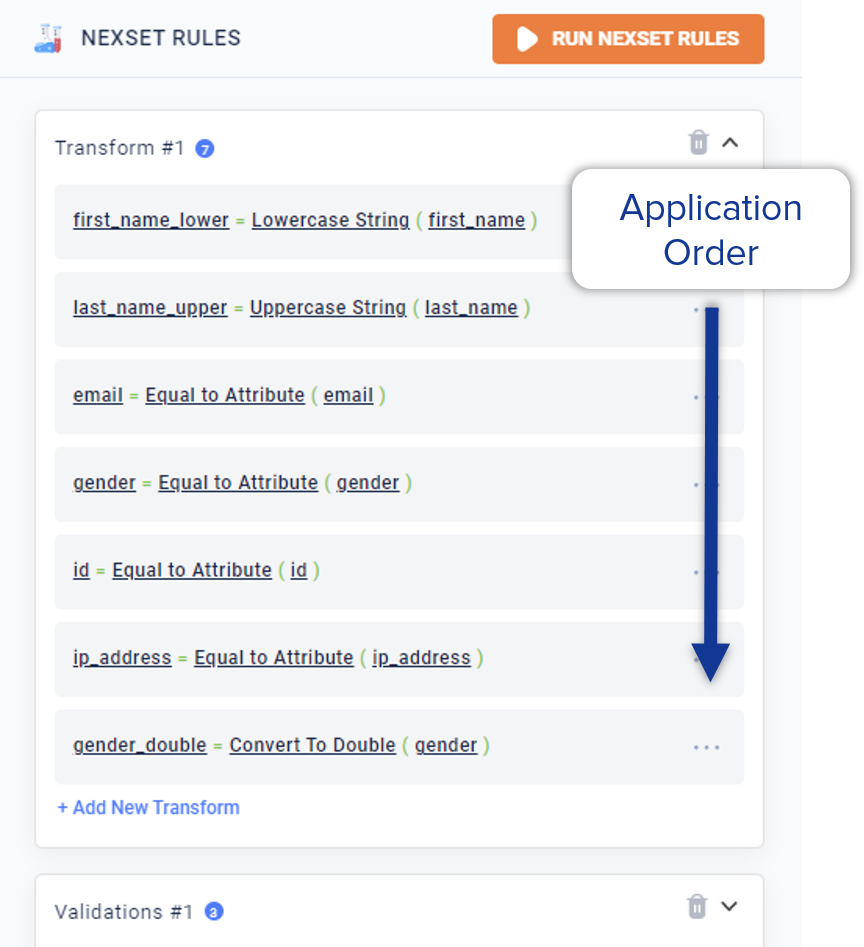
The number of rules contained in each rule group is displayed in a blue circle to the right of its title.
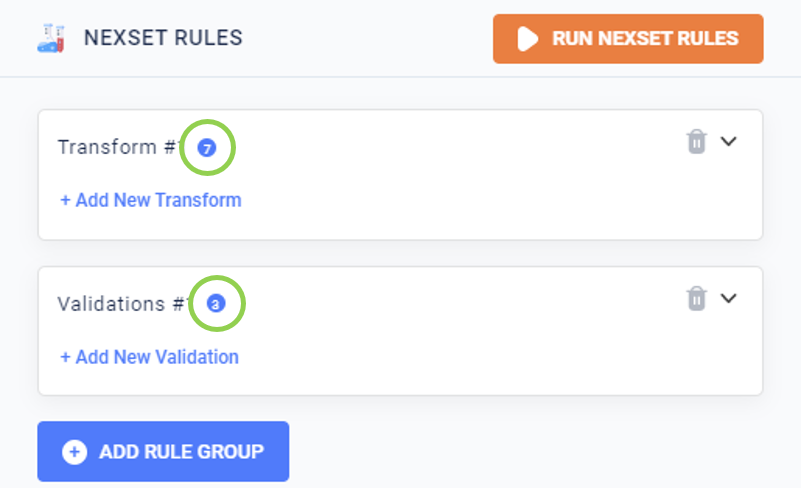
To expand or collapse a rule group, click the arrow to the right of the rule group name.
To delete an entire rule group, click the
 icon to the right of the rule group name.
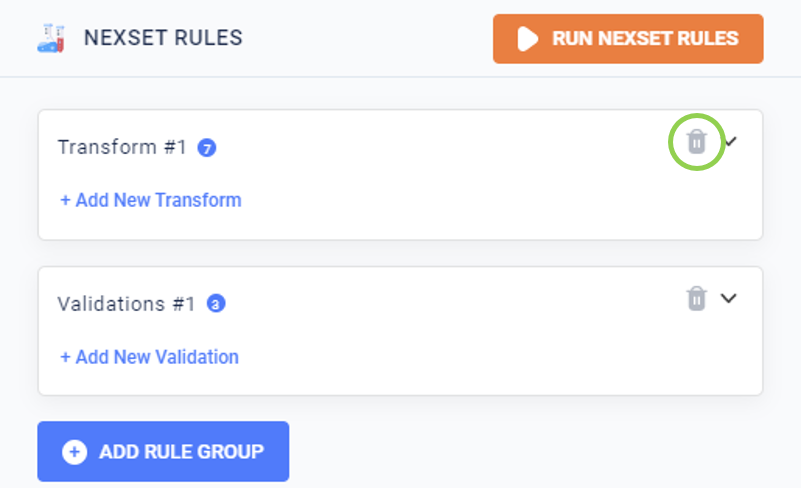
Rules can be reordered by clicking
 to the right of a rule. This expands a menu providing the options to move the rule up or down within the rule group. Select the appropriate option to change when the rule is applied in the sequence relative to other rules in the group.
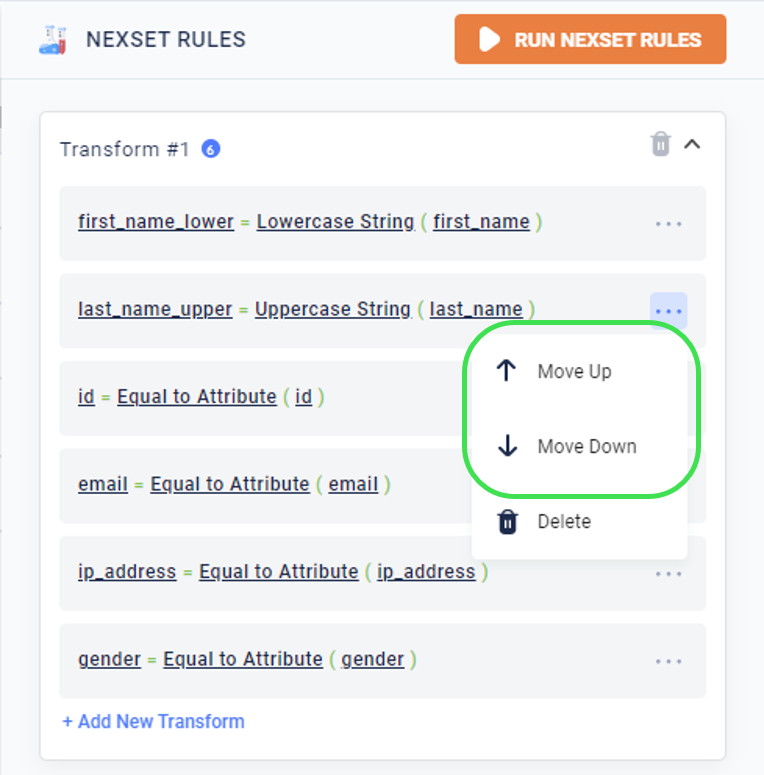
To delete an individual rule from a rule group, click
to the right of the rule to expand its menu, and select "Delete". 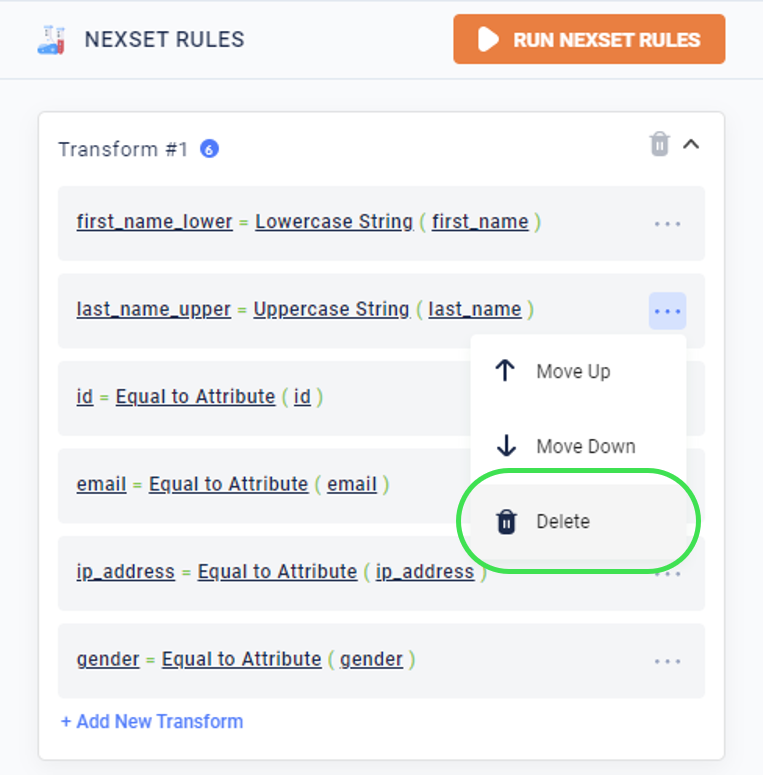
3. Troubleshooting Nexset Rules
The Nexset Designer makes recognizing and troubleshooting transformation rules that cause errors easy by allowing users to run Nexset rules as they are added and preview the corresponding Nexset output.
Clicking
in the Nexset Rules pane will produce a preview of the output attributes from all currently included transformation rules in the Nexset Output pane. This allows users to confirm whether their transformation rules will produce the expected output. More information about previewing rule outputs is provided in Section 2.2.
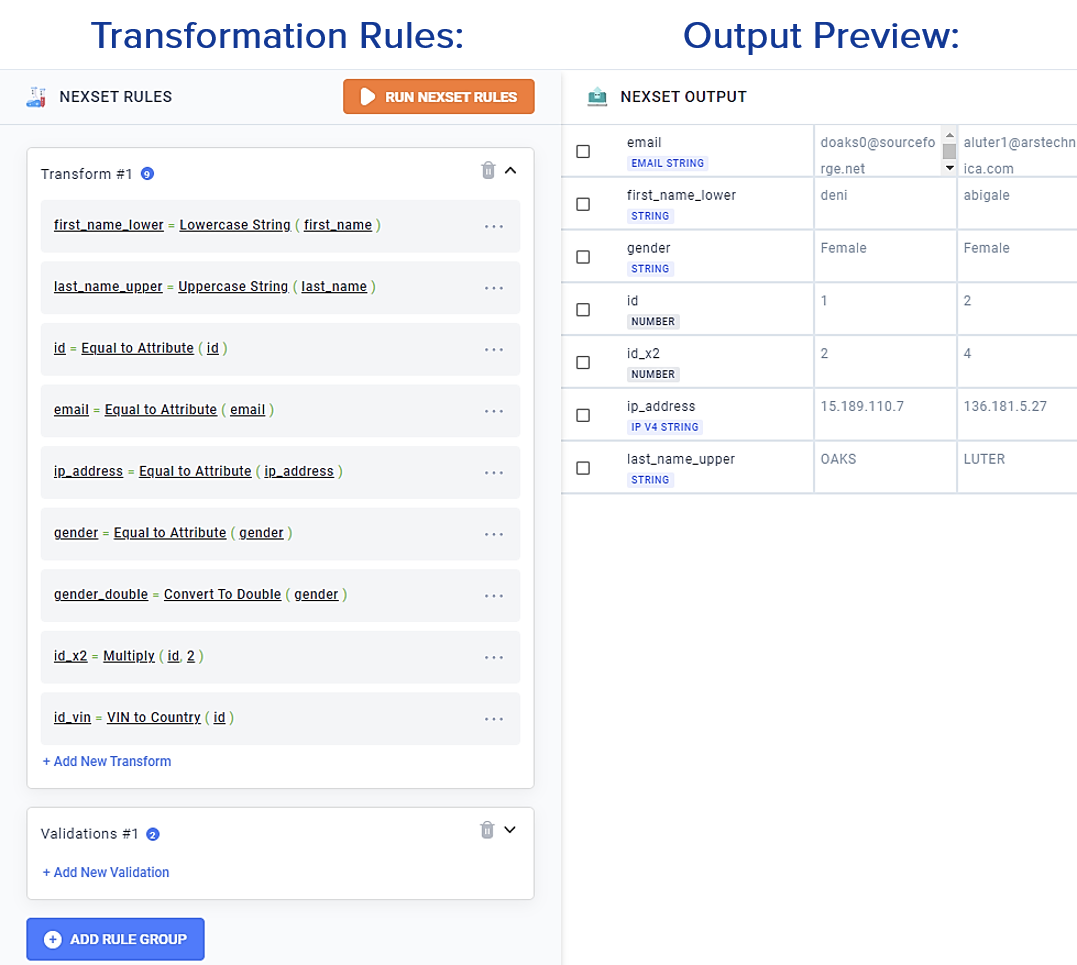
When a transformation rule causes an error, the output from that rule will not be listed in the Nexset Output preview. In this way, users can identify missing output attributes and edit the associated rules before saving the transformation.
In the below example, the expected output attributes "gender_double" and "id_vin" do not produce output in the Nexset Output preview.
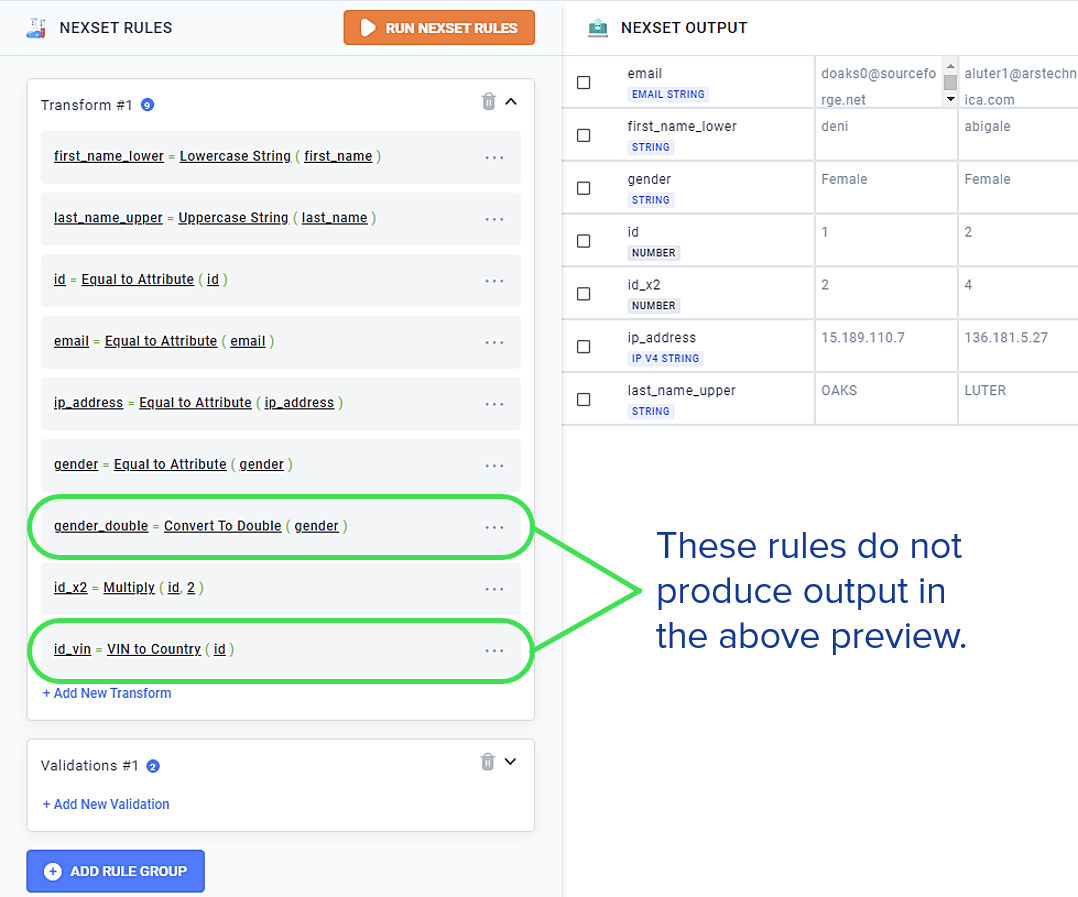
Users can then edit or remove the identified rules and click
again to determine whether the issues have been corrected before saving the transform. More information about the updates to saving transformations can be found in Section 7.
4. Nexset Input Panel
Samples, schema, and attributes of input data are shown in the Nexset Input panel on the left in the Nexset Designer screen.

4.1. Sample Viewing Options
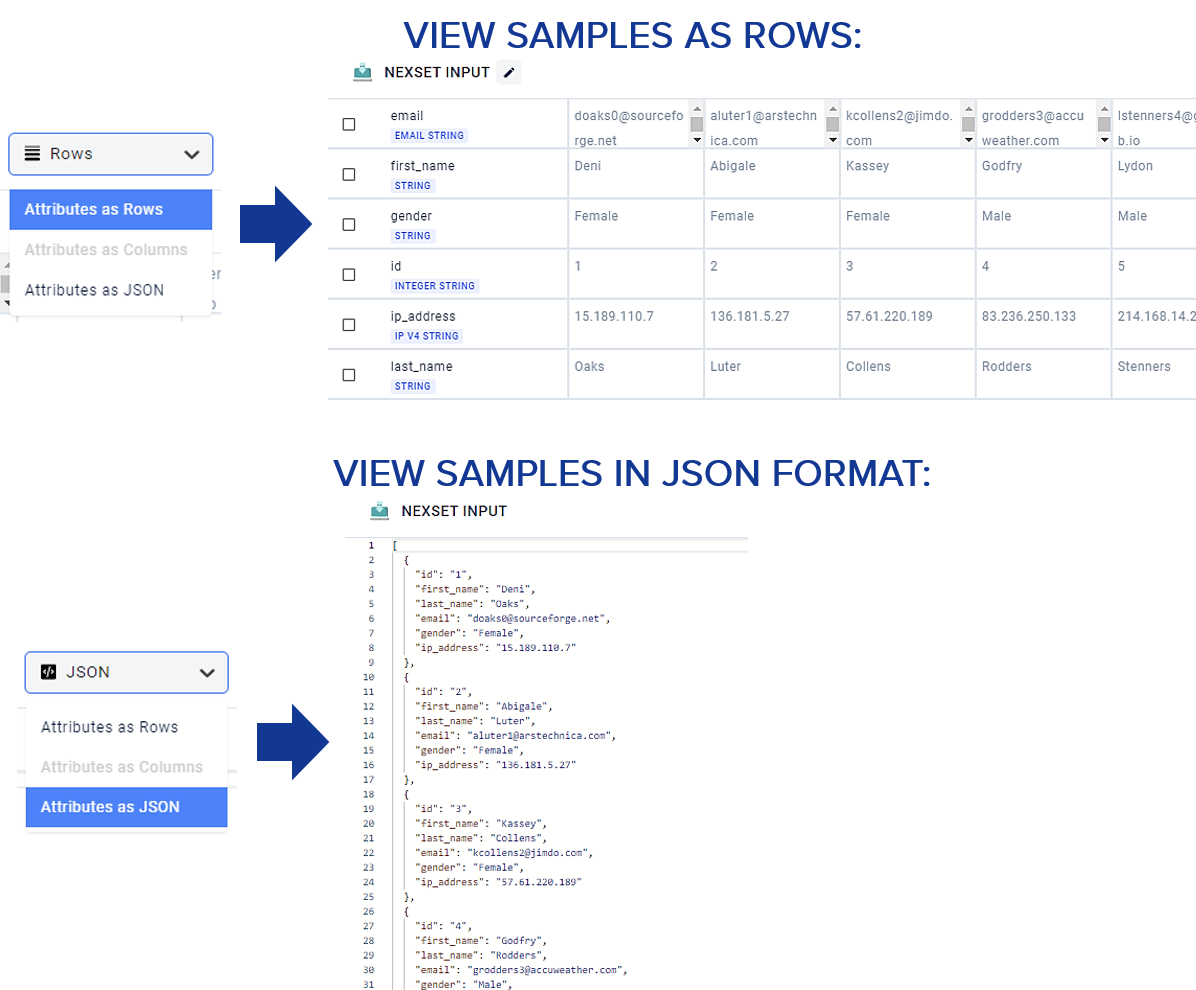
Users can change the number of input samples shown in the Nexset Input pane, as well as whether samples are viewed as rows or in JSON format.
Selected viewing options are also applied to the Nexset Output panel.
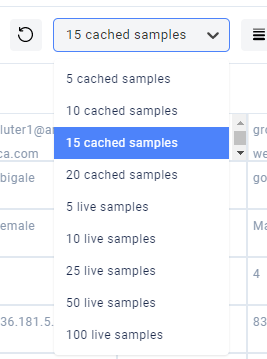
To change the number of input samples shown, as well as whether to view cached or live input samples, use the pulldown menu located in the top right corner of the screen.
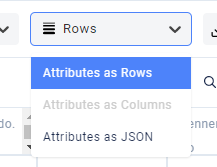
Sample attributes can be viewed in either row or JSON format by selecting the desired option from the menu also in the top right corner.
4.2. Editing Input Samples
In the Nexset Designer, input samples can be edited, which provides the ability to thoroughly test transformation rules, even when working with sparse input datasets or datasets that will be updated over time. Input sample edits are only used for the current Nexset Designer session and do not persist to the source database.
To edit input samples, click
 to the right of Nexset Input, and make any desired attribute attribute changes.
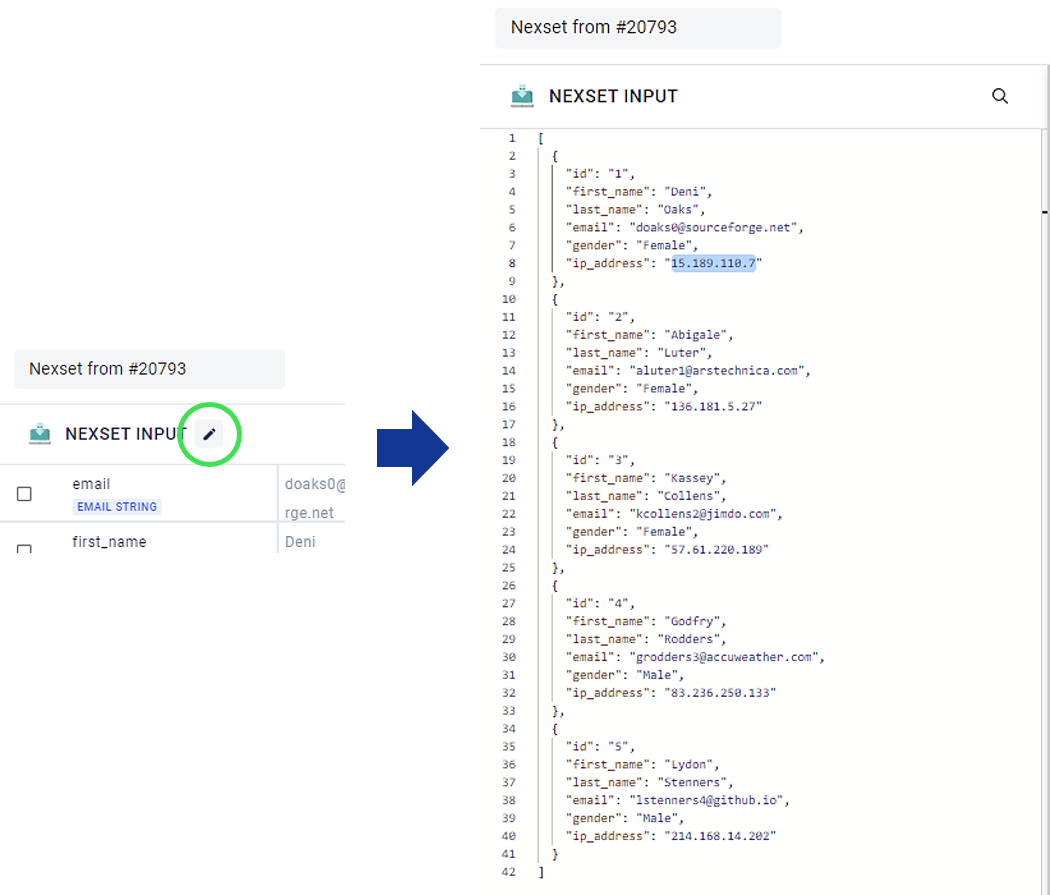
To preview the effects of transformation rules on Nexset output samples produced from the edited input samples, click
in the Nexset Rules pane. See Section 2.2 for more information about previewing rule outputs.
To revert the input Nexset samples to their original values once necessary rule testing is complete, click
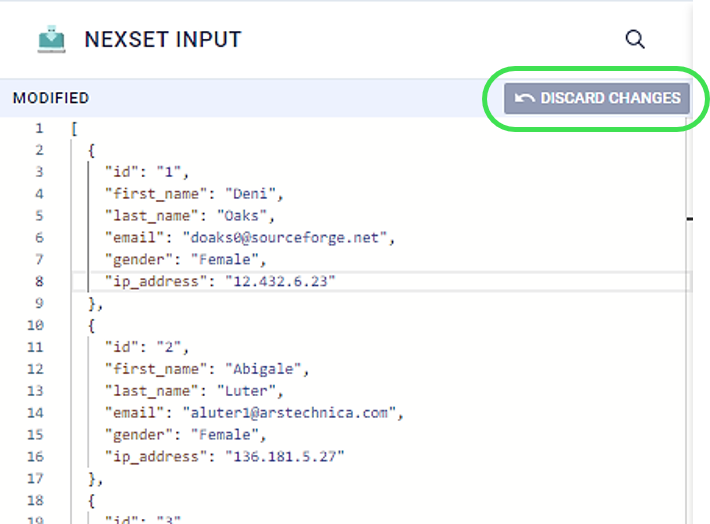
 on the top right in the Nexset Input pane.
 This does not discard saved Nexset rule changes. Any added or edited transformation rules saved before discarding input sample changes will remain saved.
5. Output Samples
Output samples that will be included in the transformed Nexset based on the current transformation rules are shown in the Nexset Output pane on the right in the Nexset Designer screen.
5.1. Output Sample Viewing Options
The number of output samples shown as well as whether sample attributes are shown in either row or JSON format can be selected by following the procedures described for input samples in Section 4.1.
Selected viewing options are also applied to the sample previews in the Nexset Input panel.
5.2. Viewing Rules Associated with Output Attributes
The Nexset Designer allows users to view transformation rules that may have produced an output attribute, enabling easier troubleshooting of Nexset outputs, transformation rules, etc.
To view the transformation rules that may have produced a particular output attribute, hover over the attribute in the Nexset Output pane, and click on the
 icon that appears to the left of the attribute name.
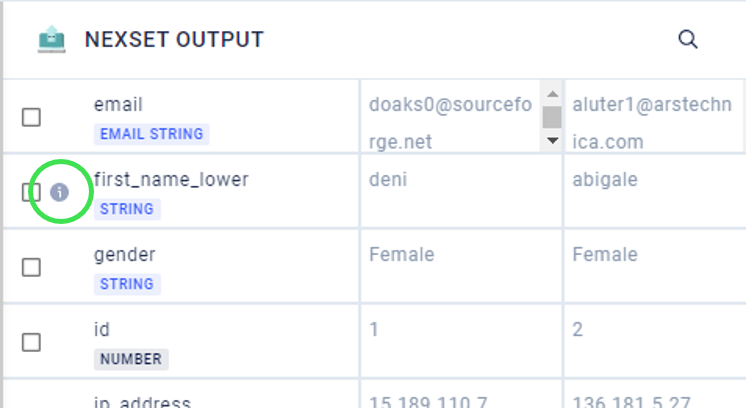
This will open a right-side window displaying the transformation rules that are relevant to the attribute at the bottom, as well as sample attribute values at the top.
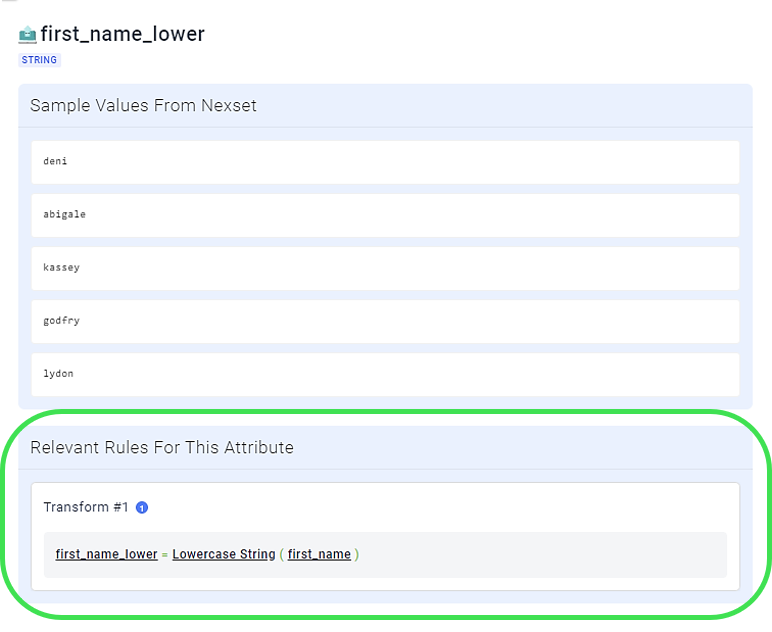
Click on a rule in the above window to view it in the Nexset Rules pane. This will open the corresponding rule group and expand the rule.

6. Output Schema Templates
Output schema templates can now be viewed by clicking  at the bottom of the Nexset Output pane to expand the Output Schema Templates section.
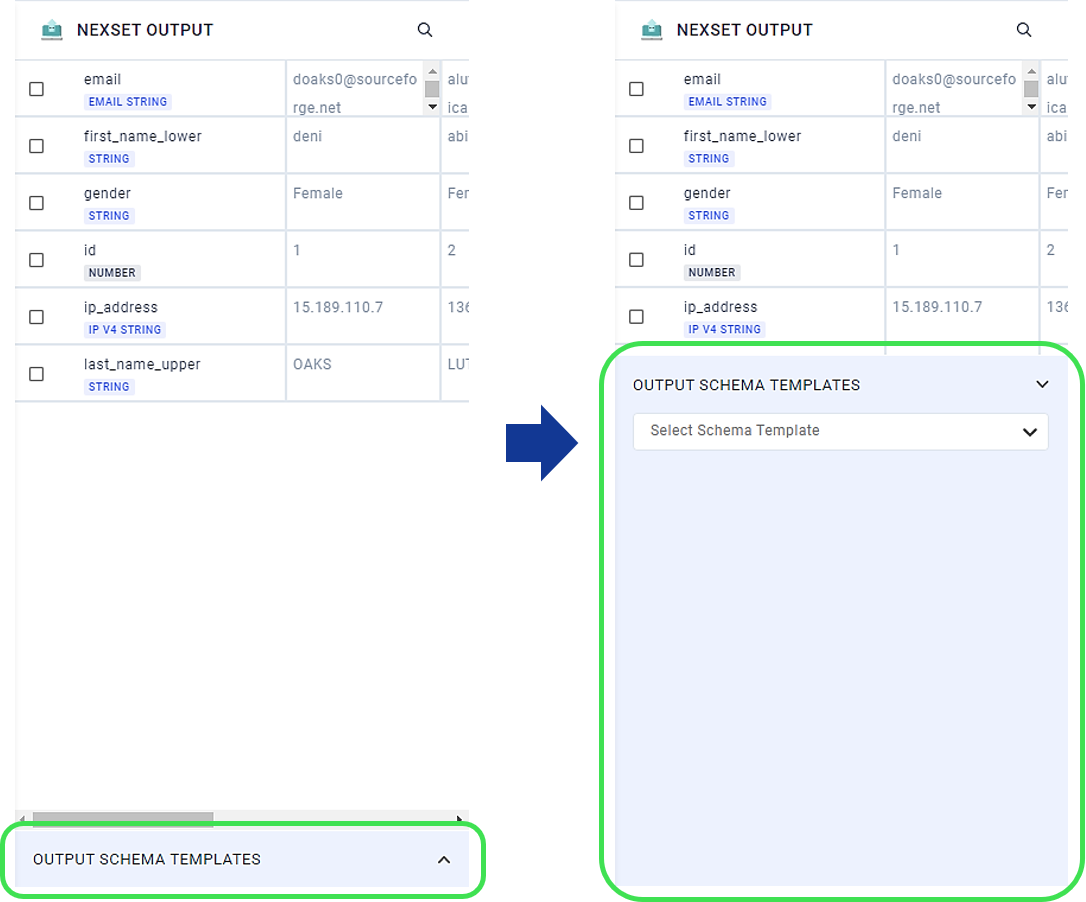
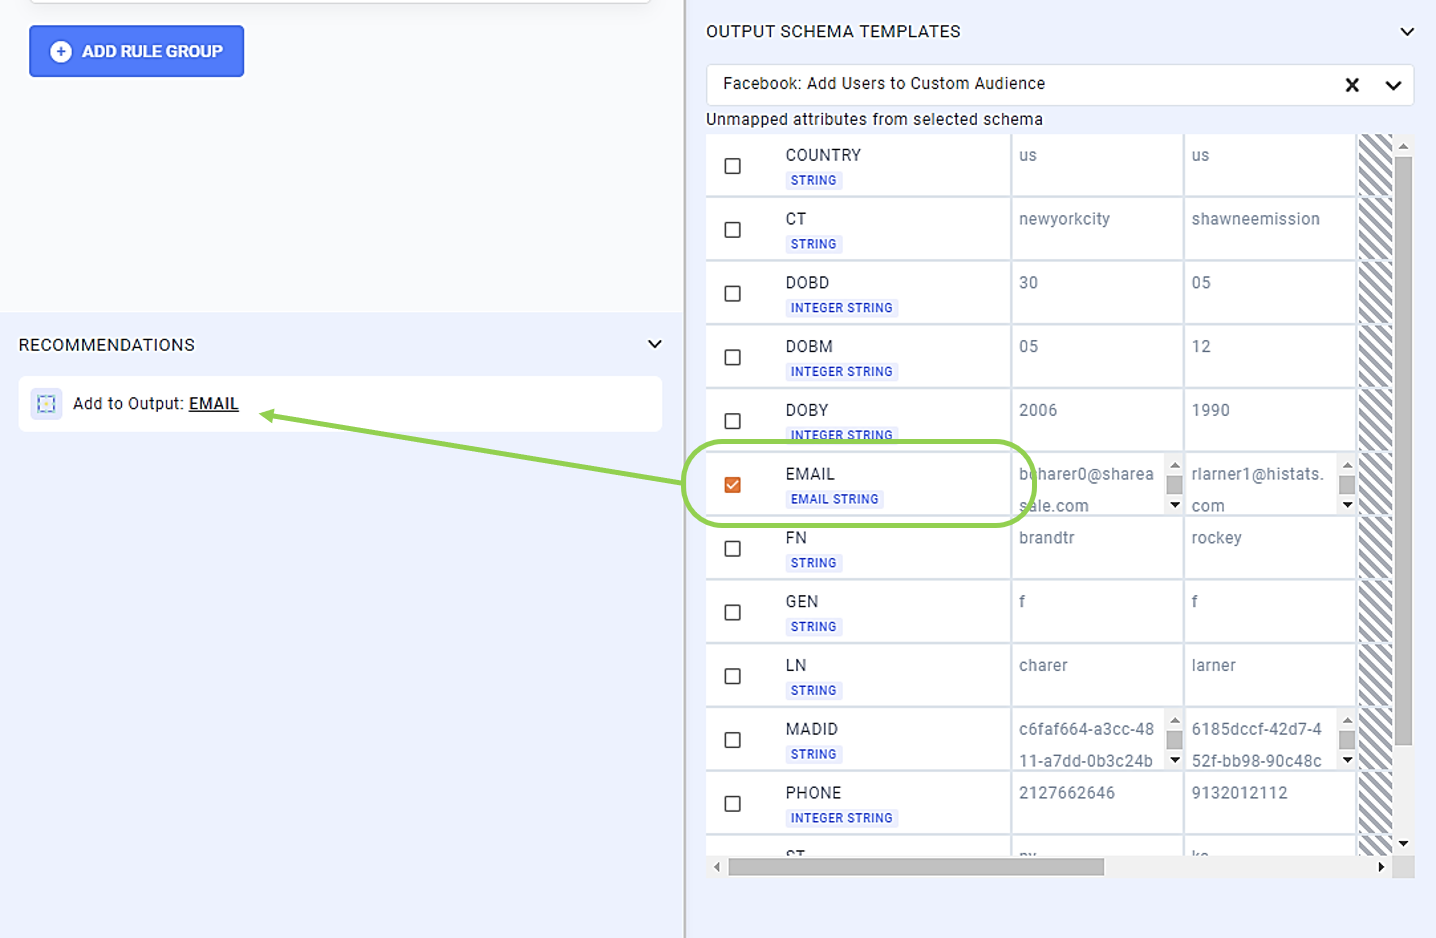
Click on the Select Schema Template pulldown menu to view a list of the available output schema templates, and select the desired template. Once a template is selected, the Nexset Designer will display a list of all unmapped attributes in the template.
Select an attribute listed in the output schema template to view recommended rules to produce that attribute. As attributes are added to the Nexset output, they are removed from the output schema template list, allowing users to easily determine which output attributes remain to be mapped.
Output schema templates can also be added. This allows users to match transformed Nexset output schema with existing templates.
For more information about creating output schema templates, see the Create a New Schema Template article.
7. Options for Saving a Transformation
When creating or editing a transformation, users have the option to either save their current progress and continue working or save and close the transformation. This is beneficial when creating or editing complex transformations—users can preview the output of added rules as described in Section 2.2 and save rules and/or rule groups that function correctly before moving on to additional transformation steps.
To save the current progress and continue editing a transformation, click
 in the top-left corner of the Nexset Designer screen.
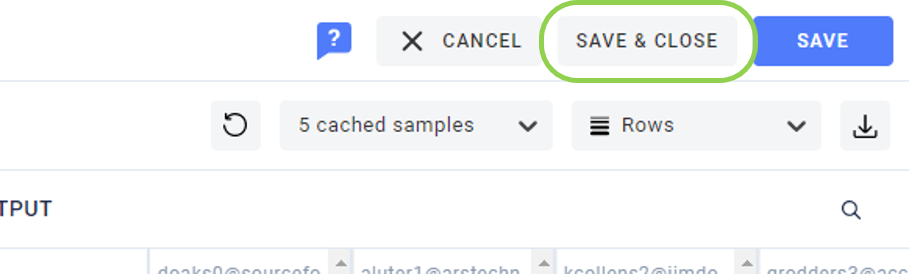
To save and close a transformation, which will exit the Nexset Designer, click
 in the top right corner of the screen.