Create a New Schema Template
This article provides information about adding a schema template to the schema template library in Nexla.
For information about how to use schema templates in Nexla, see the Using Schema Templates article.
1. What Are Schema Templates?
Some tasks require that created Nexsets comply with a predefined, consistent dataset schema specification, such as when Nexsets will be sent to API destinations. In Nexla, this is achieved with schema templates, which define the desired structure of output data. Schema templates can be easily created, edited, and used when producing new Nexsets.
Schema templates function to provide visual guidance during Nexset creation, rather than creating attribute mappings. They are not enforced on any Nexset, meaning that users can choose whether to adhere to all or a portion of a selected template. This also means that schema templates can also be modified at any time without risking an impact to existing data flows.
2. Access the Schema Template Library
To access the Schema Template Library in Nexla, hover over
 on the toolbar on the left side of the screen, and select
  from the menu that appears.
3. Define a New Schema Template
In the Schema Template Library, to begin creating a new schema template, click
 in the top right corner of the screen.
In the left panel on the screen, labeled
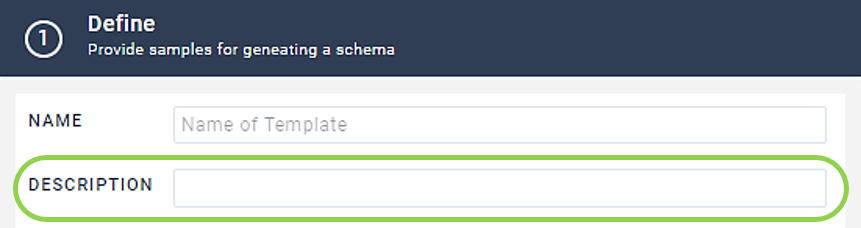
 , enter a name for the schema template in the Name field.
Optional: Enter a description of the schema template in the Description field.
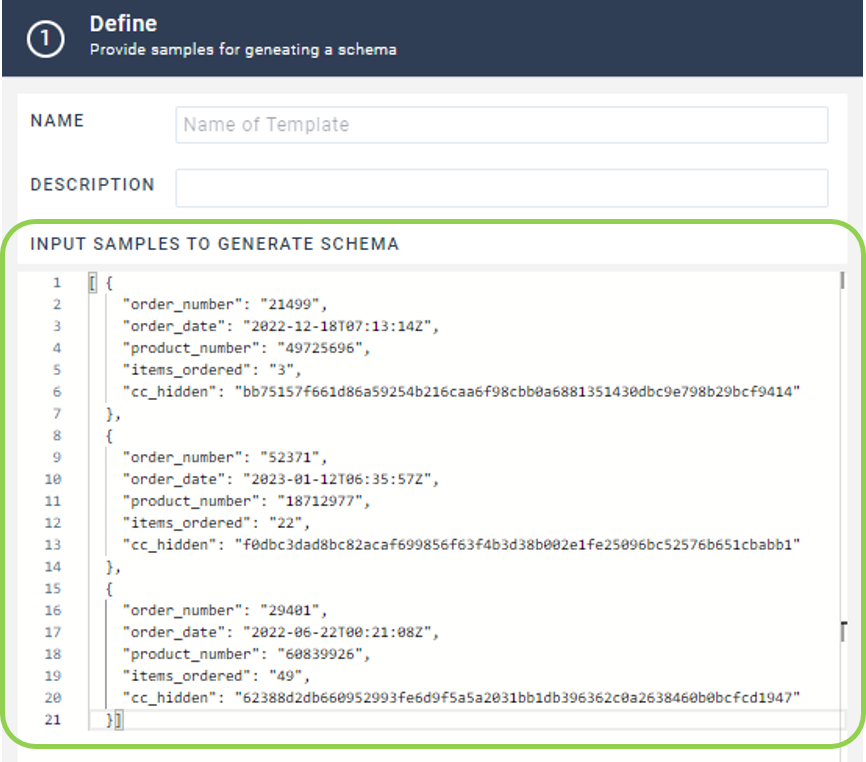
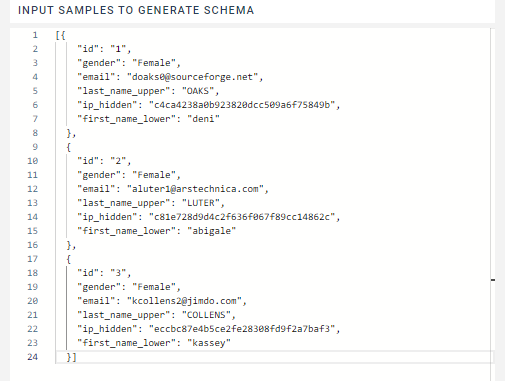
In the Input Samples to Generate Schema field, enter a JSON array of 2-3 input samples that match the desired structure.
These samples are not required to contain real data.
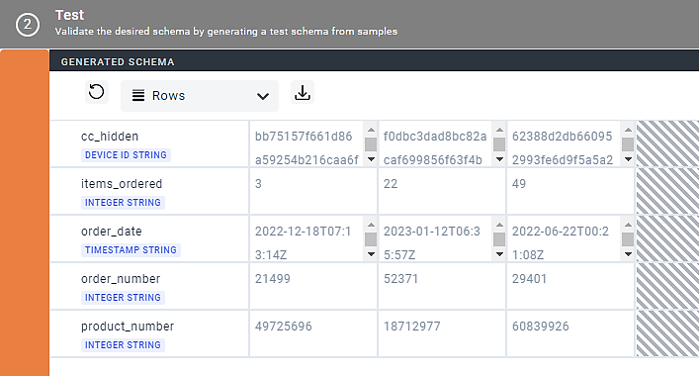
Click
 in the middle of the screen to generate a test preview of the schema in the right panel on the screen, labeled
  .
. 
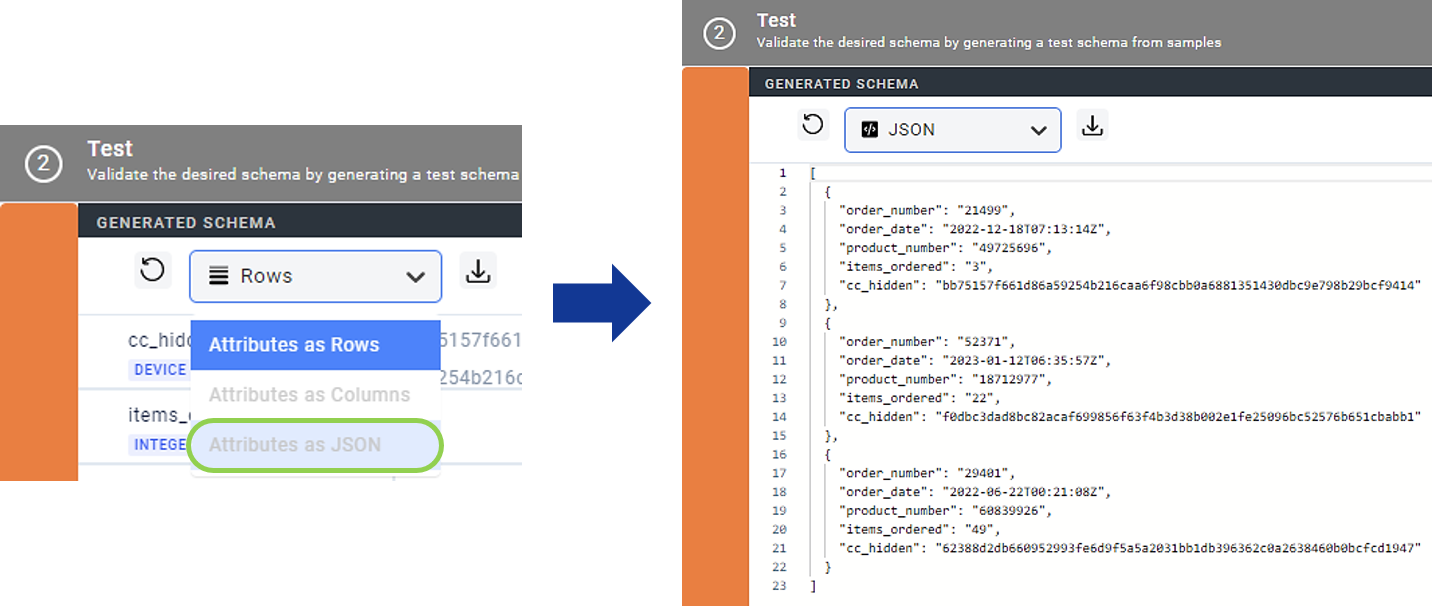
Optional: The output schema test samples can also be viewed in JSON or column format by selecting the corresponding option from the pulldown menu in the top left of the Test panel.
Confirm that the output samples are as expected. If not, changes can be made in the Define panel, and a new schema test preview can be generated. Once the generated test schema produces the desired result, click
 in the top right corner of the screen to save the schema template.
4. Create a Schema Template from an Existing Nexset
To create an schema template based on an existing Nexset, click the
 icon on the desired Nexset.
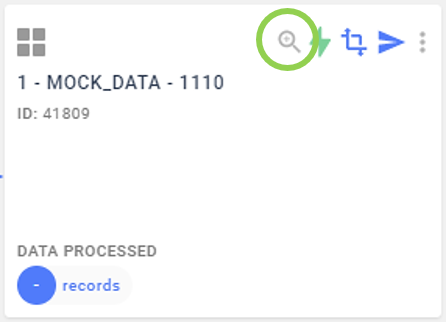
In the window that opens on the right side of the screen, select the
 tab.
tab.Select the "Attributes as JSON" option from the menu indicated below.
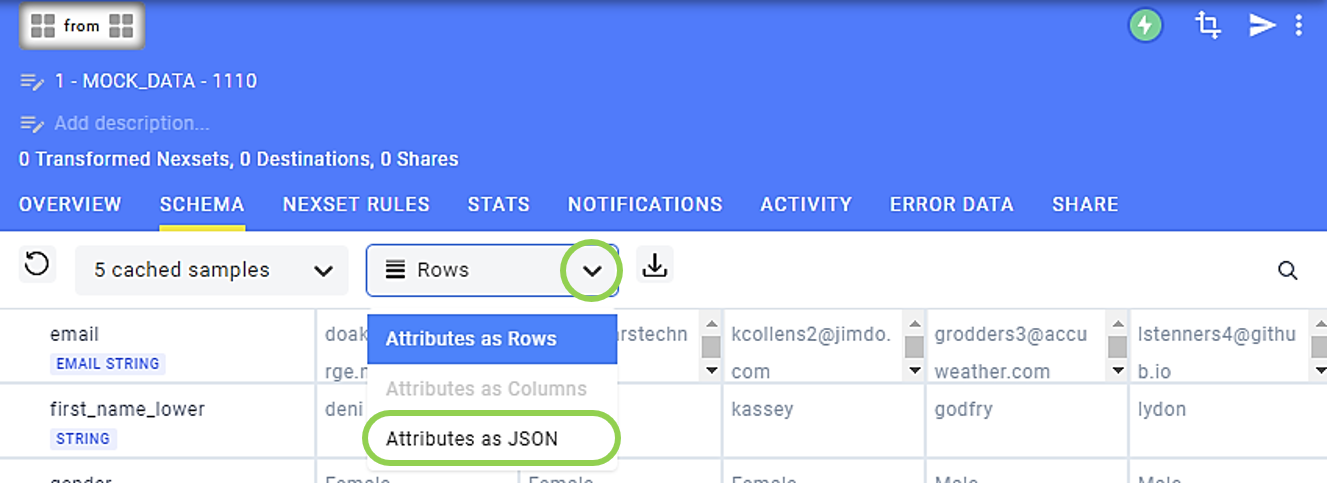
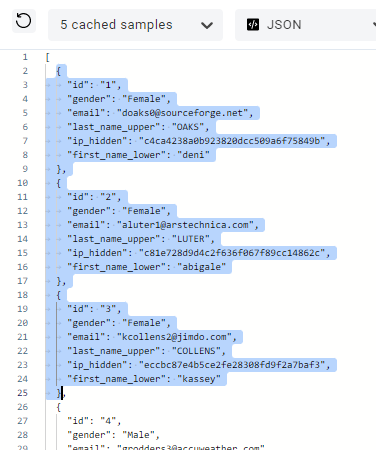
Select and copy the JSON code corresponding to 2-3 of the Nexset samples shown.
Access the Schema Template Library as described in Section 2, and click
in the top right corner of the screen.In the left panel of the screen, labeled
, enter a name for the schema template in the Name field. Optional: Enter a description of the schema template in the Description field.
Paste the JSON code copied in Step 4 between the brackets in the Input Samples to Generate Schema text field.
Click
in the middle of the screen to generate a test preview of the schema in the right panel on the screen, labeled . Optional: The output schema test samples can also be viewed in JSON or column format by selecting the corresponding option from the pulldown menu in the top left of the Test panel.
Confirm that the output samples are as expected. If not, changes can be made in the Define panel, and a new schema test preview can be generated. Once the generated test schema produces the desired result, click
in the top right corner of the screen to save the schema template.