Create a New Credential
Credentials are resources that contain authentication information allowing users to connect to and exchange data with external data systems through Nexla.
For general information about credentials and how they are used in Nexla, see Credentials in Nexla.
1. Create a New Credential
For each data source or destination in Nexla, users must either create a new credential for the corresponding external data system or select and use an existing credential.
Credentials can be created when adding a new data source or destination (Section 1.1) or from the Credentials screen in the Integrate section (Section 1.2).
1.1 New Data Source/Destination Screen
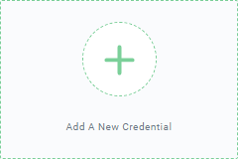
- After selecting the connector type, in step 2. Authenticate, select the Add A New Credential tile to open the pop-up credential addition form.
Add a New Credential Tile:
Add a Data Source Screen:

- The Add New Credential pop-up form will display different fields depending on the selected connector type.
Example: Amazon S3

Each credential created in Nexla must have a name, which is entered in the Credential Name field. Assigning a meaningful name that will aid with bookkeeping and help other users understand the origin and/or intended use of the credential is recommended.

Required fields are marked by an asterisk (
*).
Step-by-step instructions for setting up a new credential for each connector type in Nexla are available in the Connectors section. These instructions also cover any optional advanced settings included for each connector type.
- See the Setting Up Credentials for Connectors in Nexla info box below for more information about locating instructions for each connector.
Once all information has been entered in the Add New Credential form, click
 in the bottom right corner of the form to save and create the new credential. Newly created credentials are immediately available for use in setting up data sources and/or destinations.
Instructions for setting up a new credential are found in Section 1 of each user guide in the Connectors section on Nexla Docs.
Example: Salesforce

The Connectors section includes user guides for each connector type in Nexla.
User guides for some connectors are grouped by general type—for example, connectors that use REST-API protocols, connectors for file-based storage systems, and connectors for databases/data warehouses. These categories can be accessed from the Connectors page or by expanding the Connectors listing in the navigation menu on the left.

User guides for other types of connectors are listed directly both on the Connectors page and under the Connectors listing in the navigation menu.

1.2 Credentials Screen
New credentials can also be created directly from the Credentials screen in the Integrate section.

To create a new credential from the Credentials screen, click the
 in the top right corner of the screen.
This will open the Add Credentials screen.

In the Add Credentials screen, select the connector type for which the new credential will be used from the Credential Type pulldown menu.

- Enter a name for the credential in the Credential Name field. Assigning a meaningful name that will aid with bookkeeping and help other users understand the origin and/or intended use of the credential is recommended.

Step-by-step instructions for setting up a new credential for each connector type in Nexla are available in the Connectors section. These instructions also cover any optional advanced settings included for each connector type.
- See the Setting Up Crednetials for Connectors in Nexla info box in Section 1.1 above for more information about locating instructions for each connector.
Once all information has been entered in the Add Credentials form, click
 in the top right corner of the screen to save and create the new credential. Newly created credentials are immediately available for use in setting up data sources and/or destinations.