Embedding Nexla in Your Product
Accelerate data integration-based offerings for your end-users by embedding Nexla into your own product, putting the power of Nexla into the hands of your users. An embedded Nexla interface will improve your product experience with the power of Nexla, while showing only the essential controls that your end-users need.
This guide shows how to embed a Nexla interface into your product to address one of the most common use cases—collecting credentials from your end-users to power Nexla flows—by calling Nexla's REST API.
Optionally, you can also use Nexla's Javascript SDK, which wraps these calls in convenience functions.
The example application created in this guide will:
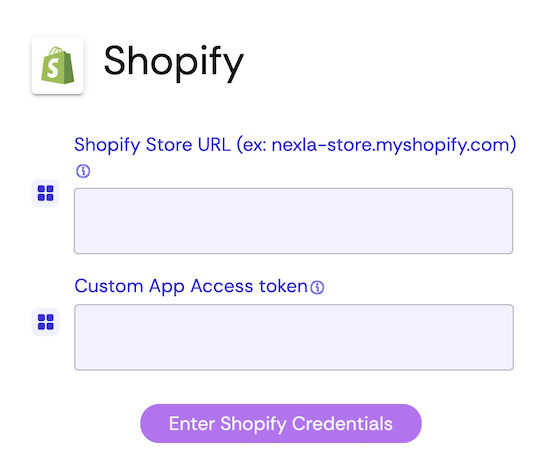
- Allow end-users of the application to enter their Shopify store credentials in the application UI
- Use the credential information to automatically create a Nexla flow that periodically moves Shopify Orders data from each user's Shopify store to a central Snowflake warehouse table
Application User's View
Nexla Flow powering this integration
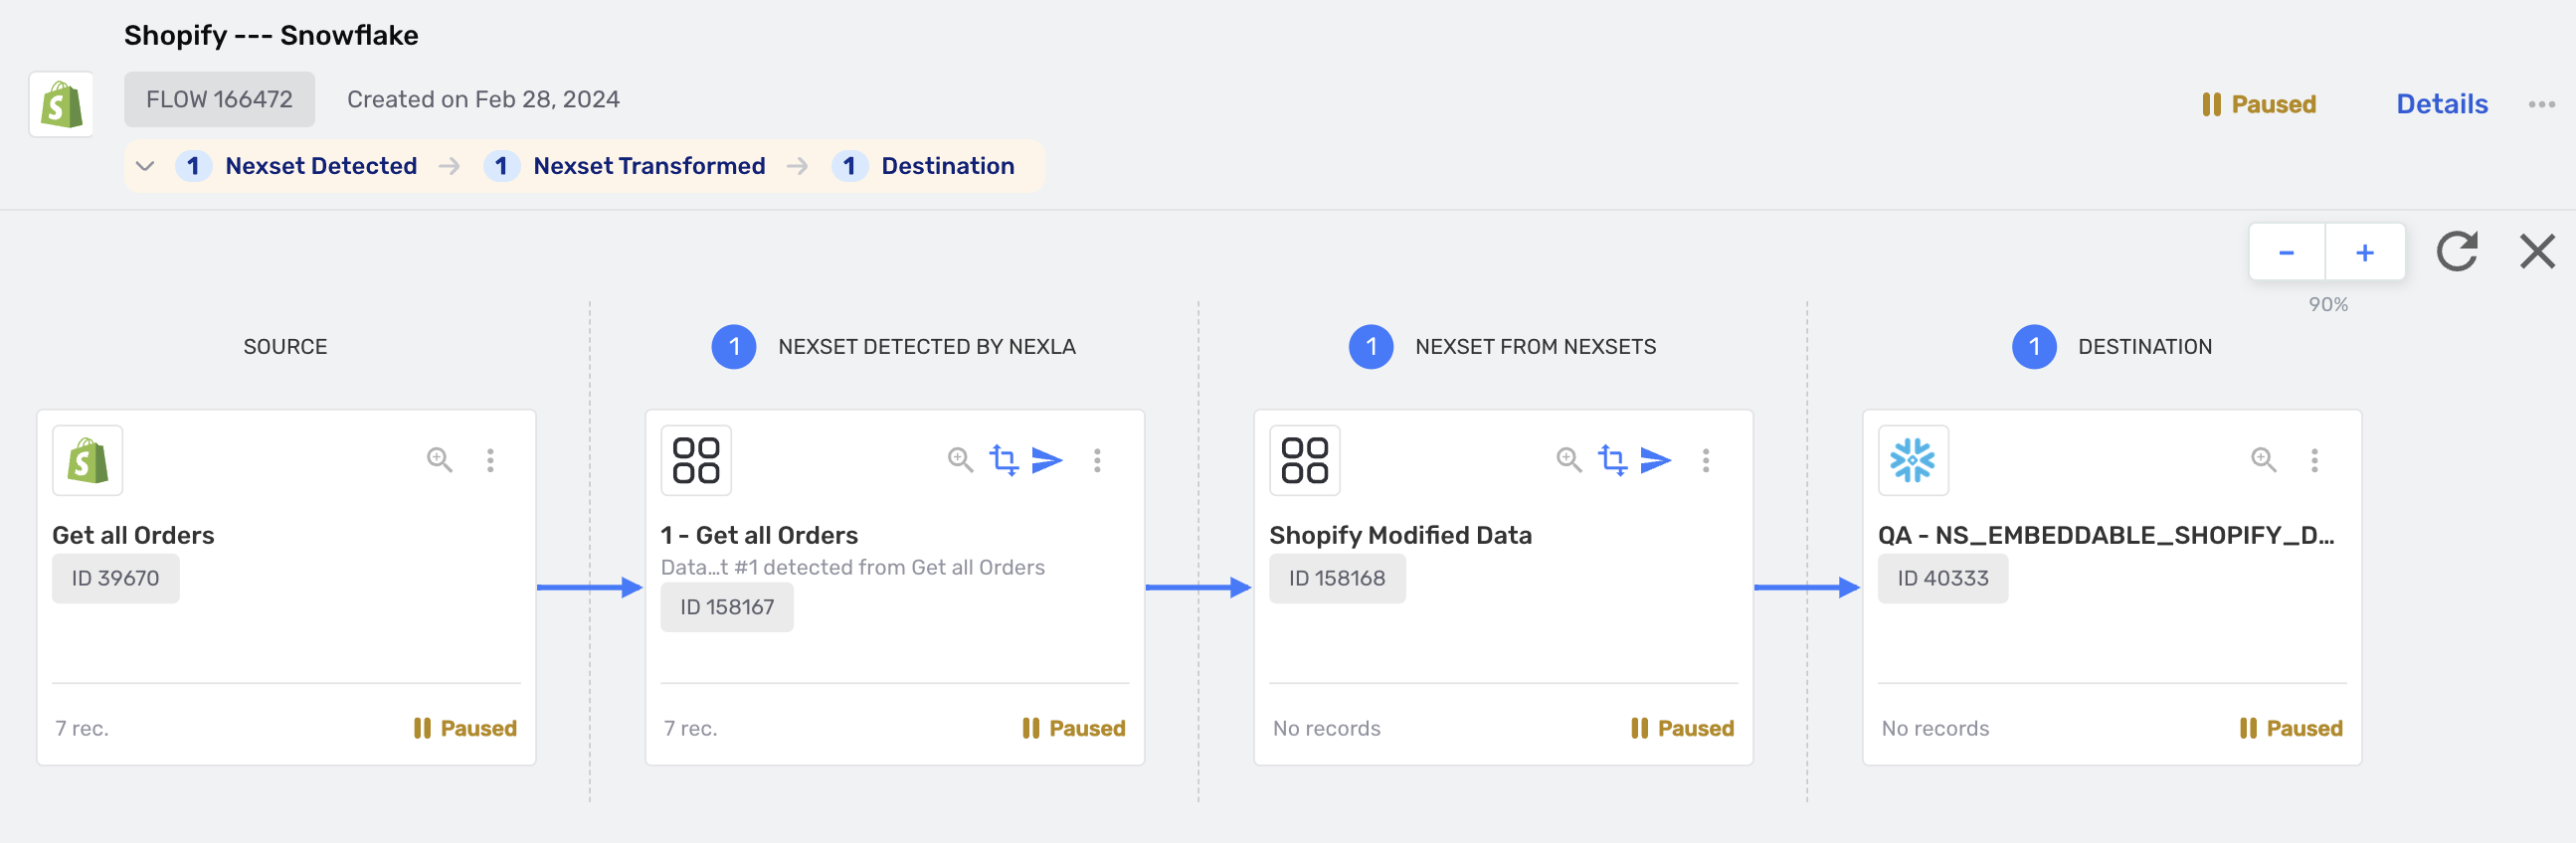
Please note that although this guide shows an example scenario wherein we only want each user's input for the source Shopify credential, you can perform these (or other relevant) steps to customize any part of the flow that needs to be modified by the user.
Prerequisites
The steps in this section need to be performed only once by a Nexla account user using the Nexla UI.
- You will need a Nexla Service token for your Nexla account where the flows will be managed.
- You will need to create a template flow that contains the logic for this integration.
Step 1: Generate a Service Key
You can create Service Keys for your Nexla account to enable programmatic session initiation in your Nexla account.
To create or manage your Service Keys:
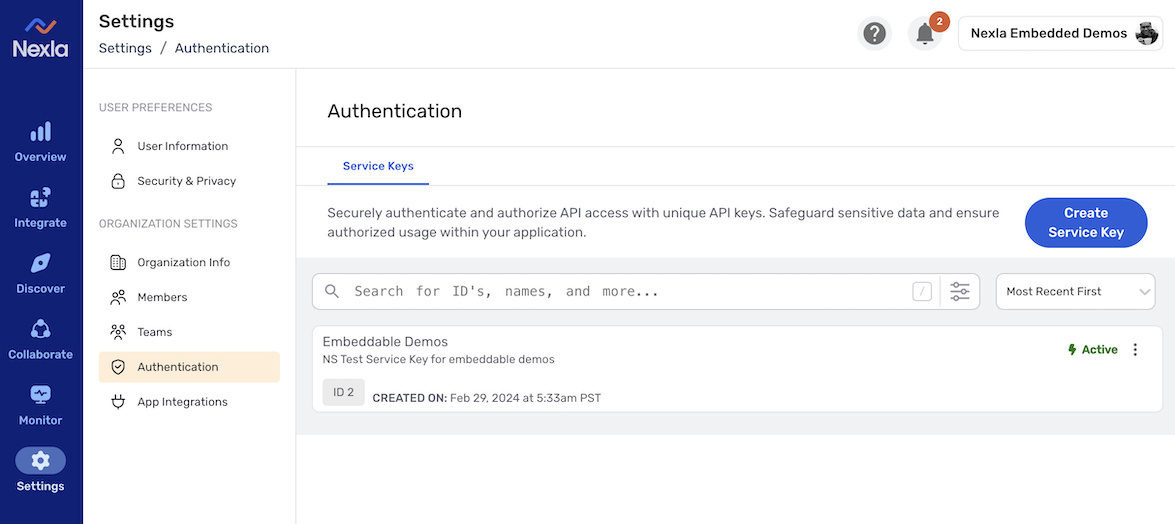
Log into your Nexla account, and navigate to the Authentication page in the Settings section.
Under the Service Keys tab, create a service key, and copy/paste the key into a secure storage location.
These keys should be treated as highly senstive and should never be exposed to your end-users, as they are equivalent to your account password. Store the key securely, and avoid sending it over the air from your server to the client browser.
Step 2: Create a Template Flow
In the Nexla UI, create the data flow that you wish to use as a reference flow. Check out the Nexla UI Quick Start Guide for instructions.
Note down the Flow ID of this Flow.
Your Application Frontend Code
Now that you have all of the relevant information that your application needs, let's start adding functionality into your front codebase that will power your application screens.
In this sample, we are calling Nexla Rest API methods in order to keep the tutorial framework agnostic. Contact our support team for our Embeddable Javascript SDK if you wish to use our SDK's wrapper methods.
Please note that calls to the Nexla API must be invoked server-side, or your domain should be whitelisted for direct Nexla API access. Client-side Javascript calls to the API from domains that have not been whitelisted by CORS will be rejected by the Nexla REST API. Please contact Nexla support team if you need your application's domain whitelisted.
Step 1: Initiate a Session
Use the Service Key generated in the previous section to start an authenticated session with the Nexla API. Check out the Authentication section in our developer guide for the API call.
Use the generated Session Access Token as a Bearer token in the Authorization header for all subsquent calls.
Step 2: Clone the Reference Flow
Now, let's add hooks to create a clone of the template flow. This will result in a new flow with new credentials that will then be updated by the user.
In this application, we want to power multiple integrations and to drive all user choices based on the specifications of different flows. Thus, we'll deduce the connector types in the template flows from the API response. However, in your application, you can do this step after Step 3 if you already know the Nexla API codename of the connector.
POST /<nexla-api-server>/flows/<template-flow-id>/copy
{
 "reuse_data_credentials": false
}
The response contains the full specifications of the new flow. We only need the following two properties, so let's save them for subsequent calls:
- The
idof the new flow. `"flows[0].id" - The Data Credential object.
"data_credentials".- For each credential, we need to keep track of the
id,vendor.id, andvendor.name. This will tell us the type of connector to which a credential belongs. For example, for a Shopify credential, thevendor.namewill beshopify_api.
- For each credential, we need to keep track of the
Step 3: Fetch And Display Shopify Credential Choices
Now, let's add the hooks to call the Nexla API endpoints that give us all of the information needed to display the Shopify credential form to the application's end-user.
In our example, we want to dynamically deduce connector choices from the flow response, so we will inspect the data_credentials object in the previous response to generate this query. However, if we wanted to hard-code a shopify connector card, we could make this call directly by harcoding the vendor.name that Nexla uses for Shopify.
GET /<nexla-api-server>/vendors?vendor_name=shopify_api&expand=1
We can use the following fields from the response to power different parts of the credential form to be displayed to the end-user:
{
    "name": "shopify_api",  //nexla connector code name for nexla api calls.

    /* Logos hosted on Nexla CDN that can be embedded in the application*/
    "small_logo": "https://cdn.nexla.io/ui/assets/vendors/logos/logo-shopify.svg",
    "logo": "https://cdn.nexla.io/ui/assets/vendors/logos/logo-shopify.svg",

    /* Credential Information*/

    "auth_templates": [
        {
            "name": "shopify_api.auth_token", //nexla codename to be used during the credential update API call.
            "display_name": "Token", //Optional. Useful if Nexla supports multiple authentication methods and you want to let the user decide.

            "auth_parameters":[
                /* All the user input fields */
                {
                    ...
                    name: "shopify_api.storeUrl", //Nexla codename to be used during the credential update API call. This will the be field name in the form.
                    display_name: "Shopify Store URL (ex: nexla-store.myshopify.com)", //input field label content.
                    description:
                    "Your Shopify Store URL, without the URL protocol. For ex, if you access Shopify https://example.myshopify.com, then the store url is nexla-store.myshopify.com.", //Tooltip information for this input field
                    data_type: "string", //type of input field.
                    order: 1, //recommended sequence in the credential form.
                    config: {
                        //extra information for deciding what type of input field to display.
                        default: "",
                        required: true,
                    },
                }
                ...

            ]
        }
        ...
    ]
    ...
}
As listed in the response snippet above, we'll use the properties in auth_templates to display user input fields in the credential form.
Step 4: Update & Test the Credential
Now, let's add hooks to the application that perform these actions when the user submits the credential form:
- Update the Nexla Credential for this User
Add this Nexla API call when the user submits the credential form. We will use the data_credentialsx.id that we saved from the Flow clone response.
PUT /<nexla-api-server>/data_credentials/<credential-id>
{
    "vendor_name": "shopify_api",
    "template_config": {
        //form data from credential form.
        "shopify_api.storeUrl":"...",
        ...
     }
}
- Test credential validity
Along with updating the credential, you can also programmatically check whether the credential is valid and provide feedback to your user.
GET /<nexla-api-server>/data_credentials/<credential-id>/probe

Response:
1. 200 Status code : <- Credential is valid
2. <HTTP Error Codes>: <-- Credential has errors.
   In this case the response body with be of the form:

    {
        "status": 403, //http status code returned by Shopify API.
        "message": "<error reason>"
    }
- Activate the Flow
Now that we have the user's credentials, we are almost done! Let's add the API call to activate the flow.
PUT /<nexla-api-server>/data_flows/<cloned-flow-id>/activate
That's it! Every time a user of our application chooses this Shopify integration and enters their credential, a new flow will be created with the user's shopify credential. We can then use the Nexla UI to manage that flow just like any other Nexla flow.